Every motorized gate you buy or spec should include these non-negotiable features: UL 325–compliant entrapment protection (photo-eyes, safety edges, and auto-reverse), a motor sized to your gate’s measured weight and duty cycle, battery backup with automatic switchover, anti-tailgating access control with revocable credentials, weatherproof enclosures rated for your climate, and documented commissioning handover from a licensed installer.
Before you sign any quote, run through this checklist:
- Photo-eye (photoelectric) beams on both sides of the gate opening, tested at handover
- Safety edges or pressure strips on the leading edge of every gate leaf
- Auto-reverse / amperometric obstruction detection with calibrated sensitivity settings documented in writing
- UL 325 compliance confirmed by a UL label on the operator and installer test logs
- Motor sized to measured gate weight and duty cycle, not estimated
- Battery backup with runtime estimate and automatic switchover test at commissioning
- Manual/emergency release accessible from outside the gate without power
- Anti-tailgating logic (vehicle-counting loops or timed auto-lock) plus revocable digital credentials
- Weatherproof enclosures with IP-rated control boxes and corrosion-resistant hardware
Schedule an on-site survey with Lowvoltagecorp to confirm UL 325 compliance and proper motor sizing before you commit to any gate system.
Key Takeaways
A motorized gate is only as reliable and safe as its weakest specified component: insist on UL 325 compliance, measured motor sizing, battery backup with a live switchover test, anti-tailgating access control, and signed commissioning documentation before you make final payment.
| Point | Details |
|---|---|
| UL 325 compliance is mandatory | Require a UL label on the operator and written test logs for photo-eyes and auto-reverse at handover. |
| Motor sizing must be measured | Insist the installer weigh the gate and provide a duty-cycle rating in writing matched to your expected daily cycles. |
| Battery backup needs a live test | Request a runtime estimate and a mains-disconnect switchover test at commissioning, not just a verbal assurance. |
| Anti-tailgating requires active logic | Vehicle-counting loops or timed auto-lock, combined with revocable per-user credentials, close the gap a basic remote leaves open. |
| Documentation protects you long-term | Collect wiring diagrams, calibration records, permit documents, and warranty terms before signing off on the installation. |
| Lowvoltagecorp covers the full process | Site survey, permitting, installation, UL 325–compliant commissioning, and maintenance contracts for South Florida properties. |
Table of Contents
- 1. Core safety systems every motorized gate must include
- 2. Access control and security features that prevent tailgating, code theft, and hacking
- 3. Power options, battery backup, and emergency operation
- 4. Gate types, materials, and choosing the right motor
- 5. Weatherproofing, material choices, and coastal corrosion considerations
- 6. U.S. safety standards, testing, and local code considerations
- 7. Costs, typical installation timeline, and routine maintenance
- 8. How to hire and validate a professional installer
- What installers actually see when these features are skipped
- Lowvoltagecorp handles gate installation from survey to sign-off in South Florida
- Sources
1. Core safety systems every motorized gate must include
Safety is where gate automation gets serious. A gate that closes on a person or vehicle is a liability event, not just a mechanical failure. The three layers every system needs are detection, reversal, and manual escape.
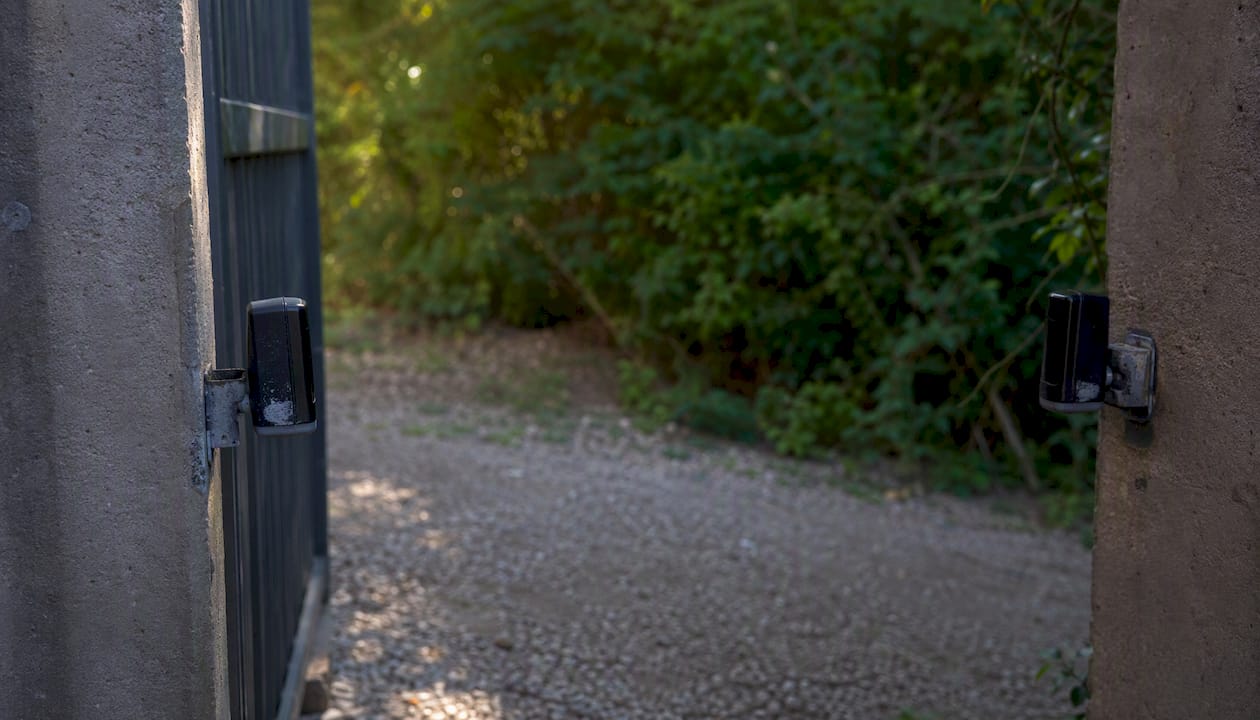
Photo-eye beams are the first line of defense. Two infrared sensors face each other across the gate opening; when the beam breaks, the gate stops and reverses. Placement matters: the UL 325 standard requires entrapment-protection devices on every residential gate operator, and photo-eyes are the most common way to satisfy that requirement. At handover, ask the installer to walk through the beam while the gate is closing. If it doesn’t reverse immediately, the alignment or sensitivity is wrong.
Safety edges and pressure strips protect the leading edge of the gate leaf, the spot photo-eyes can miss when someone is pressed against the gate rather than standing in the beam path. These are contact-based: a rubber or pneumatic strip compresses under load and triggers a stop-and-reverse signal. They’re available as retrofit kits for existing gates, with industry estimates placing retrofit costs in the $200–$400 range.
Amperometric (current-sensing) auto-reverse is the electronic backstop. The control board monitors motor current draw; when resistance spikes because something is blocking the gate, it cuts power and reverses. The sensitivity threshold must be calibrated correctly. Set it too low and the gate reverses on wind resistance; set it too high and it won’t stop for a small child. Ask for the calibrated sensitivity value in your handover documentation.
Loop detectors embedded in the driveway surface detect vehicle presence and prevent the gate from closing on a car that hasn’t fully cleared. They’re standard on commercial installations and worth specifying on any residential gate with high vehicle traffic.
Pro Tip: At commissioning, ask the installer to demonstrate all three safety layers in sequence: break the photo-eye beam, apply pressure to the safety edge, and trigger the amperometric reversal by holding the gate leaf. All three should produce an immediate stop and reverse. If any one of them fails the demo, don’t sign off.
For plain-language definitions of every sensor type mentioned here, the gate sensor terminology guide from Lowvoltagecorp is a useful reference.
2. Access control and security features that prevent tailgating, code theft, and hacking
Access control is where most homeowners underinvest. A gate with a single shared PIN and no audit trail is only marginally more secure than no gate at all.
Rolling-code remotes are the baseline. Each button press generates a new encrypted code, so a code-grabbing device parked near your driveway can’t replay a captured signal. Fixed-code remotes, still sold on some budget systems, should be rejected outright.
Keypads add a second credential type but create a shared-secret problem: once you give the code to a contractor, a housekeeper, or a neighbor, you’ve lost control of it. The answer is unique PINs per user, time-limited access windows, and a control system that lets you revoke a code without changing everyone else’s. Modern cellular controllers and Wi-Fi–enabled operators make this straightforward. Top-tier gate openers now commonly include Wi-Fi, Bluetooth, or cellular connectivity for app-based control and temporary credential management, and that capability is worth treating as a standard requirement rather than a premium upgrade.
Video intercoms add identity verification before the gate opens. A visitor presses a call button; you see and hear them on your phone before granting access. For properties with regular deliveries or service visits, this is the single most practical security upgrade available.
Anti-tailgating logic is the gap most residential systems leave open. A gate that closes on a timer after the last authorized vehicle is a start, but vehicle-counting loops are more reliable: the loop counts axles in and out and holds the gate open only while a vehicle is actively crossing. Timed auto-lock is the simpler fallback: set the gate to close within a defined window after activation, regardless of whether another vehicle is waiting.
Here’s how the main access methods compare for homeowners:
- Rolling-code remote: High convenience, no audit trail, no revocation without replacing remotes. Best for primary residents.
- Unique PIN keypad: Moderate convenience, partial audit trail if the system logs entries, easy revocation per user. Best for service providers.
- Video intercom: Lower convenience (requires active response), strong identity verification, no credential to steal. Best for visitor management.
- Smartphone app / cellular controller: High convenience, full audit log, instant remote revocation, temporary access windows. Best for properties with multiple users or rental situations.
Pro Tip: A cellular retrofit controller can add smartphone-based management to a working operator without replacing the whole system. If your gate runs reliably but lacks app control, modern gate technologies like cellular add-on modules are often the most cost-effective upgrade path.
Treating the opener and access method as one integrated system, rather than separate purchases, consistently produces better long-term results and easier administration.
3. Power options, battery backup, and emergency operation
Power choices shape how your gate behaves during South Florida’s frequent outages and how much trenching your installer needs to do.
AC mains is the most common setup for residential gates with an existing electrical service nearby. It’s reliable, supports high-duty-cycle motors, and doesn’t require battery management. The trade-off: if the power goes out, the gate stops unless you’ve specified a battery backup module.
DC (battery-assisted) systems run on a DC motor powered primarily by a battery bank that charges from AC mains. The battery is always in the circuit, so a power outage produces no interruption in gate operation. Runtime on battery alone depends on battery capacity and how often the gate cycles, but a properly sized system should handle at least 50–100 cycles after mains loss, which covers most outage scenarios for a single-family home. Ask for a runtime estimate in writing and request a live switchover test at commissioning. For a deeper look at why backup power matters, the Lowvoltagecorp guide on residential backup power covers sizing and testing in detail.
Solar-powered systems are viable for gates located far from the electrical panel where trenching costs would be prohibitive. They require a charge controller, a battery bank, and enough panel area to sustain the expected daily cycle count. In South Florida’s sun exposure, solar is genuinely practical, but it needs a correctly sized battery to handle cloudy stretches.
Comparison at a glance:
- AC mains only: Lowest equipment cost, requires battery backup add-on for outage protection, best where power is stable and trenching is easy.
- DC battery-assisted: Seamless outage protection, slightly higher equipment cost, battery replacement every 3–5 years.
- Solar: No trenching required, higher upfront equipment cost, dependent on sun exposure and battery sizing.
Manual/emergency release is non-negotiable regardless of power type. Every gate operator must have a keyed or lever-actuated manual release that allows the gate to be pushed open by hand without power. The release mechanism must be accessible from outside the gate, reachable without tools, and demonstrated to every household member at handover. This is a UL 325 requirement, not an optional feature.
4. Gate types, materials, and choosing the right motor
Matching the motor to the gate is where undersizing causes the most expensive failures. A motor rated for a 600-pound residential swing gate will burn out in months if it’s running a 1,200-pound sliding gate on a busy driveway.
Gate geometry determines motor type. Swing gates use arm-actuator or underground operators that push or pull the leaf through an arc. Sliding gates use rack-and-pinion or chain-driven operators that move the leaf laterally. Cantilever gates are a sliding variant that doesn’t touch the ground, preferred where the driveway surface is uneven. Pivot gates rotate on a central point and require specialized operators. Each geometry imposes different torque and speed requirements on the motor.
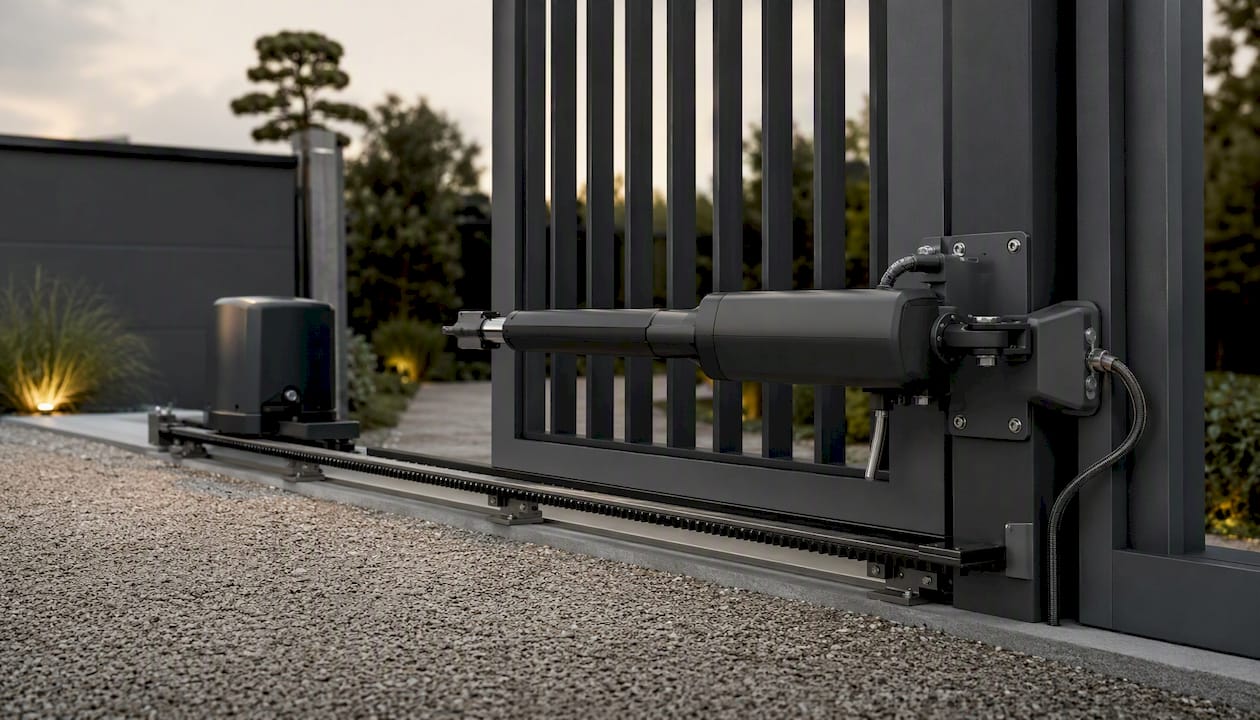
Motor technology matters for longevity. Brushless DC (BLDC) motors are the current residential standard because they eliminate the carbon-brush wear points that cause brushed AC motors to degrade under frequent cycling. BLDC motors offer higher duty cycles and longer service life by removing that wear mechanism entirely. They also run cooler, which matters in South Florida’s heat. Hydraulic operators are the heavy-duty alternative for very large or very frequently cycled gates, but they’re overkill for most residential applications.
Soft-start and soft-stop functionality reduces mechanical stress on hinges, posts, and the gate frame itself. A gate that lurches to full speed and slams to a stop is wearing out its hardware with every cycle. Soft-start/stop produces quieter, smoother movement that homeowners notice immediately in daily use.
Motor selection checklist:
- Measured gate weight (not estimated)
- Leaf length and hinge condition
- Wind exposure (coastal properties need higher torque margins)
- Expected daily cycle count
- Available power supply
- Mounting constraints (underground vs. above-ground operator)
For sizing context: residential sliding gate motors commonly cover capacities in the 400–600 kg range, while industrial units are specified for loads exceeding 2,000 kg. Use those ranges as a ballpark before a measured site survey, not as a substitute for one.
| Motor category | Typical gate weight capacity | Common application |
|---|---|---|
| Light residential | Up to 400 kg | Single-leaf swing, light sliding |
| Standard residential | 400–600 kg | Double-leaf swing, medium sliding |
| Heavy residential / light commercial | 600–1,000 kg | Large sliding, high-frequency residential |
| Industrial | 2,000 kg+ | Commercial sliding, barrier gates |
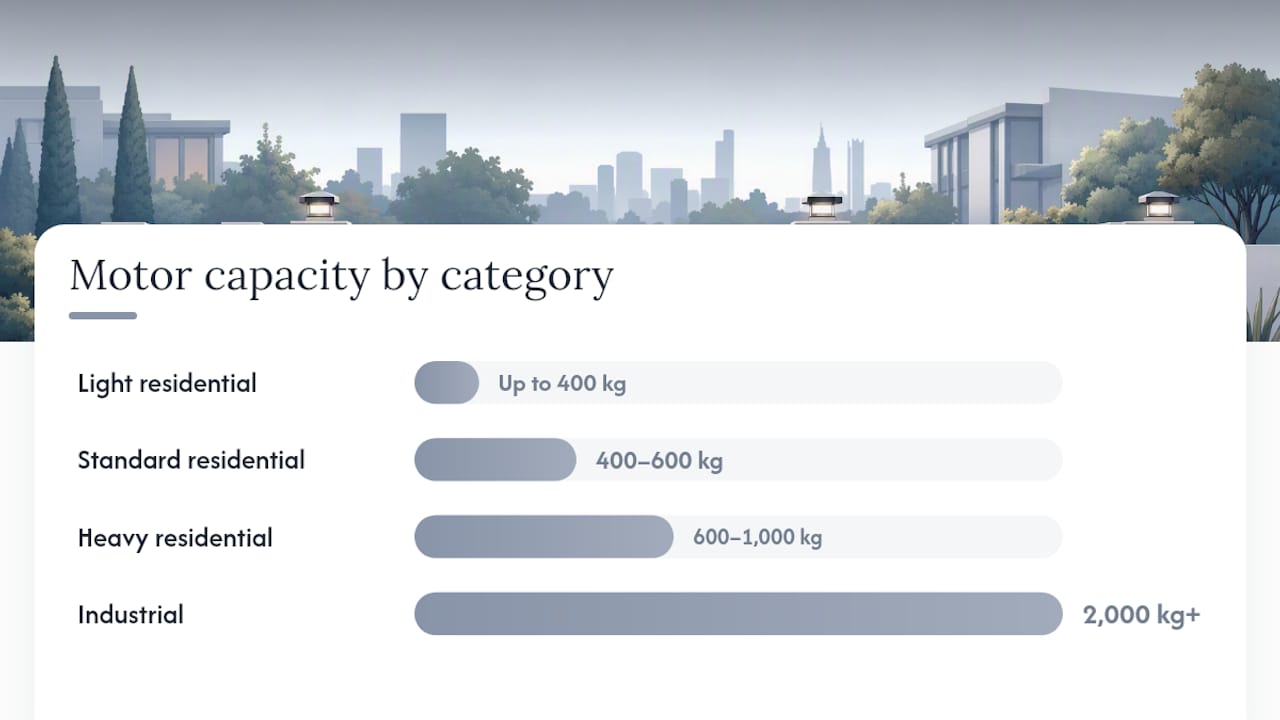
Capacity ranges sourced from Quiko Italy’s gate automation guide.
Pro Tip: Insist that your installer weigh the gate leaf on-site or provide a calculated weight from the fabrication spec sheet. A motor duty-cycle rating in writing, matched to your expected daily cycles, is the document that protects you if the operator fails prematurely. Choosing the right opener based on measured gate load is the single most reliable way to prevent early failures.
5. Weatherproofing, material choices, and coastal corrosion considerations
South Florida is one of the harshest environments for metal gate hardware in the continental United States. Salt air, humidity, and UV exposure accelerate corrosion on any finish that isn’t specified for coastal conditions.
Steel offers the best strength-to-cost ratio and handles high-wind loads well, but it requires powder coating or galvanizing to resist rust. In coastal zones, standard powder coat isn’t enough. Marine-grade epoxy primer under a polyurethane topcoat, or hot-dip galvanizing before painting, extends service life significantly. Any bare steel exposed at cut edges or weld points is a corrosion start point.
Aluminum is naturally corrosion-resistant and lighter than steel, which reduces motor load. The trade-off is lower structural stiffness for the same section size, so aluminum gates in high-wind zones need heavier profiles or additional bracing. Anodized or powder-coated aluminum performs well in coastal conditions without the rust concern.
Timber-clad gates look premium but demand the most maintenance. The timber infill expands and contracts with humidity, which stresses fasteners and can warp the frame over time. If you want the appearance, specify aluminum or steel framing with timber cladding rather than a timber-framed gate.
For coastal installations specifically:
- Use stainless steel fasteners (316-grade, not 304) throughout, including hinge bolts and track hardware.
- Specify sealed underground housings for any below-grade motor or control equipment, with drainage channels to prevent water pooling.
- Require IP65-rated or higher control boxes for all above-ground enclosures exposed to rain or spray.
- Ask about sacrificial zinc anodes on underground steel components where cathodic protection is practical.
Noise is a related but often overlooked issue. A gate that grinds and bangs every morning at 6 AM is a neighbor problem. BLDC motors with soft-start/stop, properly lubricated rack-and-pinion drives, and anti-vibration motor mounts keep operational noise low. Loose hardware amplifies noise; a gate that was quiet at installation and gets louder over time is telling you something needs tightening or lubricating.
Pro Tip: For coastal properties, schedule a visual inspection at six months post-installation, not just annually. Salt air works fast on any finish breach, and catching a rust spot at six months costs a can of touch-up paint. Catching it at three years costs a gate replacement.
6. U.S. safety standards, testing, and local code considerations
UL 325 is the standard that governs entrapment protection for residential and commercial gate operators in the United States. It specifies the types and placement of entrapment-protection devices required for each gate configuration, and it applies to the operator, not just the safety accessories. A UL-listed operator that’s installed without the required safety devices is still a non-compliant installation.
What UL 325 compliance looks like in practice:
- A UL label on the operator itself, confirming the unit was manufactured to the standard
- Tested and aligned photo-eyes with beam-break reversal confirmed at commissioning
- Documented sensitivity settings for the amperometric reversal system
- Manual release accessible and demonstrated
- Written test logs from the commissioning technician
Gates installed before 2010 frequently lack modern safety devices like photoelectric sensors and automatic reversal mechanisms. If you’re buying a property with an existing gate, treat it as non-compliant until an installer confirms otherwise in writing.
Permits and inspections vary by jurisdiction, but most U.S. municipalities require an electrical permit for any new gate operator installation that connects to mains power. Some jurisdictions also require a building permit for the gate structure itself. Ask your installer which permits apply in your county before work begins. An installer who says permits aren’t necessary for a hardwired gate installation in a Florida municipality is a red flag.
Compliance checklist for handover:
- UL label visible on the operator
- Photo-eye alignment test passed and logged
- Amperometric reversal sensitivity value documented
- Safety edge function tested and confirmed
- Manual release demonstrated and location noted
- Battery backup switchover tested
- All permits closed and inspection records retained
Keep every document from this list. If a future owner, insurer, or attorney asks whether the gate was installed to code, these records are your answer.
7. Costs, typical installation timeline, and routine maintenance
Gate automation costs vary widely depending on gate size, motor type, access control complexity, and site conditions. Understanding the line items helps you evaluate quotes rather than just compare totals.
Main cost factors:
- Gate fabrication or supply (steel, aluminum, or timber-clad)
- Motor/operator selection (residential BLDC vs. hydraulic)
- Safety devices (photo-eyes, safety edges, loop detectors)
- Trenching and concrete work for posts, tracks, and underground conduit
- Electrical work (panel connection, conduit run, junction boxes)
- Access control hardware (keypad, intercom, cellular controller)
- Permitting fees
- Commissioning and testing labor
Correct post and hinge sizing, drainage for underground housings, and installer-friendly control boards are the installation details that most affect long-term durability and reduce repeat service calls. These aren’t line items you want value-engineered out of the quote.
Typical installation timeline for a residential gate in South Florida:
- Site survey and design: 1–3 days
- Quote approval and equipment ordering: 3–10 business days
- Civil work (post setting, concrete, trenching): 1–2 days
- Equipment installation and wiring: 1–2 days
- Testing, commissioning, and handover: half a day to 1 day
Total elapsed time from survey to operational gate: typically 2–4 weeks, depending on equipment lead times and permit processing.
Routine maintenance schedule:
| Task | Interval | Notes |
|---|---|---|
| Visual inspection (hardware, hinges, track) | Monthly | Check for loose bolts, rust spots, debris in track |
| Photo-eye alignment and beam test | Every 6 months | Clean lenses, confirm reversal response |
| Lubrication (rack, hinges, pivot points) | Every 6 months | Use manufacturer-specified lubricant |
| Amperometric sensitivity check | Annually | Confirm calibrated value matches commissioning record |
| Battery backup test (runtime and switchover) | Annually | Replace battery if runtime has degraded |
| Full system service by installer | Annually | Includes all of the above plus control board inspection |
| Battery replacement | Every 3–5 years | Earlier if annual test shows degraded runtime |
For a full walkthrough of what a professional service visit covers, the step-by-step gate automation guide from Lowvoltagecorp outlines each stage from installation through ongoing maintenance.
Warranty coverage worth requesting: a minimum two-year parts warranty on the operator, one year on labor, and a written service response window (typically 24–48 hours for non-emergency faults). Preventative maintenance on the schedule above is the most reliable way to keep warranty claims off the table entirely.
8. How to hire and validate a professional installer
The checklist below is what you should run before signing a contract and at the commissioning walkthrough. A qualified installer won’t hesitate at any of these requests.
Before the appointment:
- Ask for proof of general liability insurance and, where required in Florida, a low-voltage contractor license.
- Confirm the installer has experience with UL 325 compliance and can provide prior-project references or photos.
- Ask which permits they’ll pull and who is responsible for scheduling the inspection.
- Request a written quote that itemizes gate weight, motor model, duty-cycle rating, and safety devices separately.
At commissioning, require these tests:
- Photo-eye beam-break test: walk through the beam while the gate is closing and confirm immediate stop and reversal.
- Safety edge compression test: press the leading edge against a fixed object and confirm stop and reversal.
- Amperometric reversal test: hold the gate leaf with moderate resistance and confirm the motor detects the load and reverses.
- Loop detector test (if installed): drive a vehicle over the loop and confirm the gate holds open.
- Battery backup switchover test: disconnect mains power and confirm the gate continues to operate normally.
- Manual release demonstration: confirm the release is accessible, functional, and that you can push the gate open by hand.
Documentation to collect at handover:
- Wiring diagrams and control board settings
- Sensitivity calibration records for the amperometric reversal
- Battery runtime test result
- Photo-eye alignment confirmation
- Written warranty terms and service schedule
- Permit and inspection records
- Emergency contact for out-of-hours faults
Treating the operator, safety devices, and access control as one integrated system produces the most reliable long-term outcomes. An installer who quotes the operator alone and treats safety devices as optional add-ons is not quoting a complete system.
For troubleshooting common failures after installation, the motorized gate troubleshooting guide from Lowvoltagecorp covers the most frequent sensor and operator issues property owners encounter.
What installers actually see when these features are skipped
The gates that generate repeat service calls share a short list of root causes: undersized motors, missing or misaligned safety sensors, poor grounding, and no documentation from the original installation. An undersized motor doesn’t fail dramatically on day one. It runs warm, cycles slower over time, and then stops working entirely on the hottest day of the year when the gate is being used most. By then, the original installer is long gone and the homeowner has no motor spec to reference.
Missing photo-eyes are the liability version of the same problem. A gate without functioning entrapment protection isn’t just a code violation; it’s a documented risk that an insurer or plaintiff’s attorney will find. The cost of retrofitting photo-eyes and a safety edge, which industry estimates place at roughly $150–$400 per device type, is a fraction of what a single incident costs.
Commissioning documentation is what separates a professional installation from a handshake job. When a control board needs to be replaced three years later, the wiring diagram and sensitivity calibration record tell the next technician exactly what the system was set to. Without them, every service call starts from scratch. That’s not a minor inconvenience; it’s a recurring labor cost that compounds over the life of the system.
The checklist in this article isn’t a wish list. Every item on it exists because its absence has caused a real failure on a real property.
Lowvoltagecorp handles gate installation from survey to sign-off in South Florida
Skipping the site survey is where most gate projects go wrong. Motor sizing, permit requirements, conduit routing, and safety device placement all depend on conditions that can’t be assessed from a phone call or a photo. Lowvoltagecorp’s gate installation service starts with an on-site survey that measures gate weight, assesses post and hinge condition, identifies the correct motor and duty cycle, and confirms which permits apply to your jurisdiction.
From there, Lowvoltagecorp handles permit applications, civil work coordination, equipment installation, UL 325–compliant safety device setup, access control configuration, and the full commissioning walkthrough described in this article. Every installation includes signed test logs and a written service schedule. For South Florida property owners who want a gate system that’s sized correctly, documented properly, and backed by a local team available for maintenance and emergency service, the next step is straightforward: request a site survey and installation estimate and get a written quote that covers the complete system, not just the operator.
Sources
The following sources were used in this article and are worth bookmarking for your own procurement and handover process:
- Best gate opener overview – Nimbio
- Types of automatic gates: complete guide to gate automation
- Factoryfast
When reviewing these sources, focus on the motor capacity examples and duty-cycle definitions (Quiko), the BLDC longevity argument (ACCESS TECH), and the safety-device definitions and retrofit options (Automated Gate Supply). Those three areas are where most homeowners have the least information when evaluating contractor quotes.