Most IP cameras need between 0.5 Mbps and 8 Mbps per stream, depending on resolution and codec: figure roughly 0.5 to 1 Mbps for 720p, 1 to 4 Mbps for 1080p, and 6 Mbps or more for 4K. To get total network load, add up every camera’s average Mbps and multiply by 1.2 to build in 20% overhead. Keep your uplink under 50 to 70% utilization, run 1GbE for aggregates up to roughly 200 Mbps, and move to 10GbE as you approach 1 Gbps.
TL;DR:
- Overhead of 20% to 30% should be added to total network traffic to account for protocol spikes and secondary streams for reliable performance.
- Planning for peak bitrate is essential, as busy scenes and I-frame intervals can increase bandwidth needs by up to three times, risking packet loss if underestimated.
- Use a 1.2 multiplier on total calculated Mbps to determine the actual uplink capacity, ensuring steady performance without exceeding 70% utilization.
- Conduct on-site pilot testing for 48 to 72 hours to measure real network load and avoid overestimating capacity based on manufacturer’s datasheets or estimations.
Table of Contents
- How Do You Calculate Total CCTV Bandwidth Requirements?
- What Factors Change a Camera’s Bitrate the Most?
- How Do You Size the Network Around That Bandwidth?
- Which Calculators Should You Use to Estimate Bandwidth?
- How Much Storage Does Your Retention Policy Require?
- How Do You Pilot-Test a Camera Network Before Full Deployment?
- What an Installer Learns From Measuring Real Networks
- Get a Bandwidth Audit Instead of Guessing
- Sources
- FAQ
How Do You Calculate Total CCTV Bandwidth Requirements?
Bandwidth planning starts with a distinction most spec sheets ignore: average bitrate versus peak bitrate. A camera rated at 4 Mbps average might spike to 7 or 8 Mbps during a busy scene because of I-frame bursts. Plan around the average, but size your network for the peak, or you’ll get packet loss the first time something interesting happens on screen.
Here’s the process:
- List every camera’s expected average bitrate based on resolution, codec, and frame rate (see the ranges below).
- Multiply by camera count for cameras sharing a group or switch.
- Add secondary streams. If cameras run a lower-resolution feed for remote viewing, add another 0.5 to 1 Mbps per camera.
- Apply overhead. Multiply the running total by 1.2 for network and protocol overhead, per EngineersUniverse’s planning guidance.
Worked example: Eight 1080p cameras running H.265 at 15 fps (1.5 Mbps average each) plus two 4K cameras at 6 Mbps each: (8 × 1.5) + (2 × 6) = 12 + 12 = 24 Mbps raw. Add secondary streams at 0.75 Mbps × 10 cameras = 7.5 Mbps. That’s 31.5 Mbps before overhead. Multiply by 1.2 and you land at roughly 38 Mbps sustained, which fits comfortably on a single Gigabit uplink with plenty of room to spare.
What Factors Change a Camera’s Bitrate the Most?
Resolution sets the ceiling, but several other variables decide where a camera actually lands within its range.
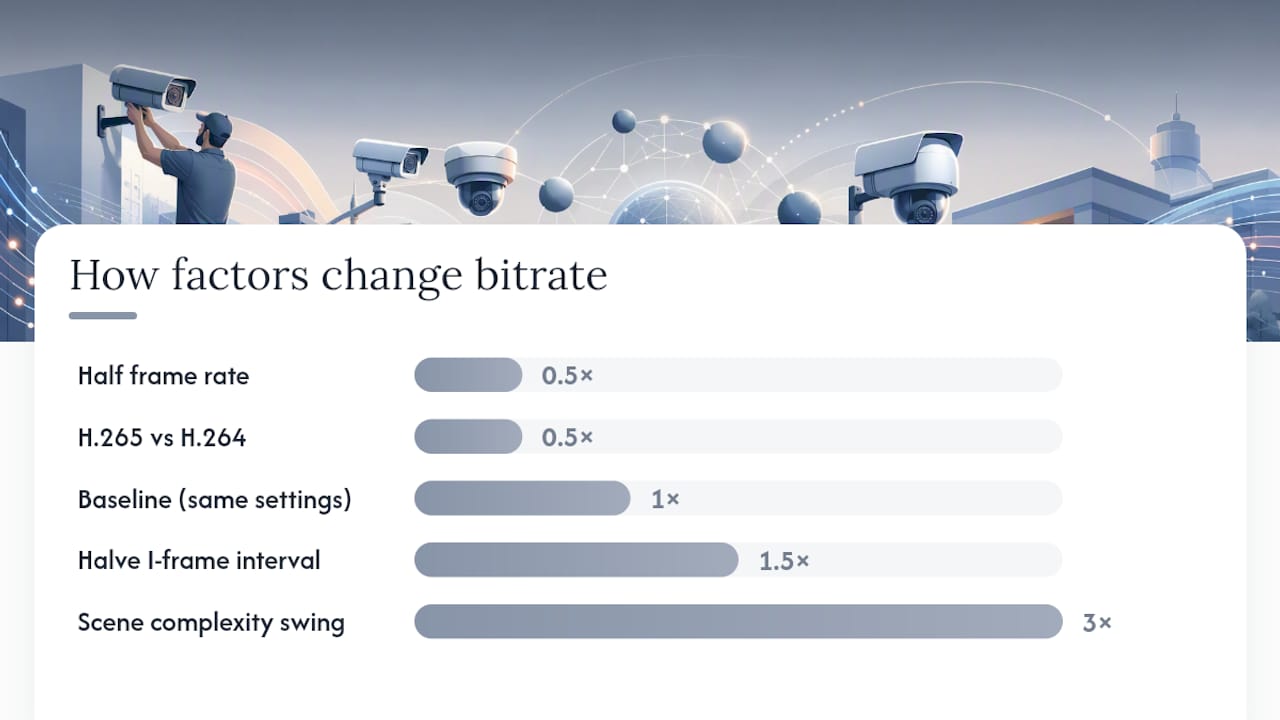
- Frame rate scales almost linearly. Dropping from 30 fps to 15 fps roughly cuts bitrate in half, which is why most parking lot and hallway cameras don’t need full frame rate.
- Codec efficiency matters more than resolution. H.265 typically runs about half the bitrate of H.264 at the same quality, and H.265+ pushes savings further on static scenes by suppressing redundant background pixels.
- Scene complexity is the wild card. A quiet loading dock at night and a busy retail entrance during a sale can differ by a factor of 3, and the CCTVplanner calculator models this as roughly 0.4x to 1.6 or 2x the baseline bitrate.
- I-frame interval (GOP length) drives average bitrate more than most installers realize. Halving the interval can raise the average bitrate by 40 to 60% because I-frames carry far more data than the P or B frames between them.
Scene complexity can swing bandwidth by roughly 3x between a quiet scene and a busy one, according to CCTVplanner’s modeling. That’s the single biggest reason two identical camera models on the same network can post wildly different real-world numbers.
On the encoding side, most cameras offer Variable Bit Rate (VBR) or Constant Bit Rate (CBR). VBR is more efficient because it spends bits where motion actually happens, but it complicates capacity planning since you don’t get one fixed number. Constrained VBR, which sets a target average plus a hard maximum cap, gives you the best of both: efficient storage most of the time, with a ceiling that keeps a chaotic scene from blowing out your uplink.
How Do You Size the Network Around That Bandwidth?
Once you know your aggregate load, the network side comes down to four decisions.
- Overhead percentage. Use 20% as your baseline for protocol and spike overhead. Bump it to 25 to 30% when cameras share a switch with regular office or IT traffic, or when the deployment uses multicast streaming.
- Uplink sizing. Keep steady-state traffic under 50 to 70% of port capacity. A single Gigabit uplink handles most small to mid-size deployments; once your practical aggregate throughput starts pushing past 700 to 800 Mbps, it’s time to move to 10GbE rather than stack a second Gigabit link and hope.
- PoE power budget. Bandwidth capacity and PoE power are separate math problems, but they hit the same switch. A 24-port switch that can handle the data load might still run out of PoE wattage before every camera is powered, especially with PTZ units or heaters in cold-climate housings.
- VLANs and QoS. Put cameras on their own VLAN. It isolates surveillance traffic from corporate data, and QoS tagging keeps a video spike from choking out point-of-sale or phone traffic on a shared network.
Pro Tip: Fast Ethernet uplinks (100 Mbps) get overloaded fast on even modest camera counts. If you’re inheriting an older switch stack, confirm the uplink is Gigabit before you add a single camera.
Which Calculators Should You Use to Estimate Bandwidth?
A handful of free tools do the heavy lifting, but they’re only as good as the inputs you feed them.
- CCTVplanner’s bandwidth calculator accounts for codec and scene complexity, and it’s the most useful tool when you want a constrained-VBR target with a realistic maximum cap rather than a single flat number.
- JVSG’s bandwidth and storage calculator is built for larger multi-camera projects and pairs bandwidth estimates with lens and coverage planning in the same workflow.
- Arxys-style enterprise calculators work best when you’re also sizing NVR storage arrays and need bandwidth and disk throughput modeled together.
Whichever tool you use, don’t trust the manufacturer’s datasheet CBR figure at face value. It’s usually a best-case number measured on a static test chart, not a real hallway or parking lot. Feed the calculator your actual scene complexity and I-frame interval, then translate the output into concrete purchases: NIC speed, uplink tier, and NVR disk throughput, not just a Mbps figure on a page.
How Much Storage Does Your Retention Policy Require?
Bandwidth and storage are the same math problem viewed from two angles. Once you know a camera’s bitrate, storage per day follows a fixed formula.
- Storage per day (GB) = bitrate (Mbps) × 3600 × 24 ÷ 8 ÷ 1024.
- For a 1080p camera running H.265 at 1.5 Mbps continuous, that’s 1.5 × 86,400 ÷ 8 ÷ 1024 ≈ 15.2 GB per day.
- Multiply by your retention window (30, 60, or 90 days for many security camera retention policies) and by camera count for the full array.
Real-world tables put continuous 1080p H.265 recording at roughly 8 to 15 GB per day, with 4K running proportionally higher. Motion-only recording can cut that by 60 to 80% depending on how much activity the scene actually sees. Whatever number you land on, add 20 to 30% storage headroom on top. Retention rules vary by state and by what a property’s insurance or lease terms require, and cloud storage tends to cost more per gigabit-month than local network video recorders, but it removes the single point of failure that comes with an on-site NVR getting stolen or damaged alongside the cameras.
How Do You Pilot-Test a Camera Network Before Full Deployment?
Run a pilot for 48 to 72 hours before committing to a full rollout. Log average bitrate, 95th percentile bitrate, and any I-frame spikes during that window, since the calculator’s estimate and the real network rarely match on day one.
- If the connection is upload-limited, switch to constrained-VBR, lower the frame rate, or move quiet cameras to motion-only recording.
- Stagger I-frame scheduling across cameras so they don’t all spike at the same instant.
- Watch for packet loss or jitter; if you see either, add uplink capacity or apply QoS before adding more cameras.
- The two most common mistakes: trusting a datasheet’s best-case bitrate, and forgetting to budget for the secondary remote-viewing stream that most NVR software runs by default.
Pro Tip: Run your pilot during the property’s actual busy period, not a quiet Tuesday morning. A parking garage or lobby that looks fine at 10 a.m. can double its bitrate at shift change.
What an Installer Learns From Measuring Real Networks
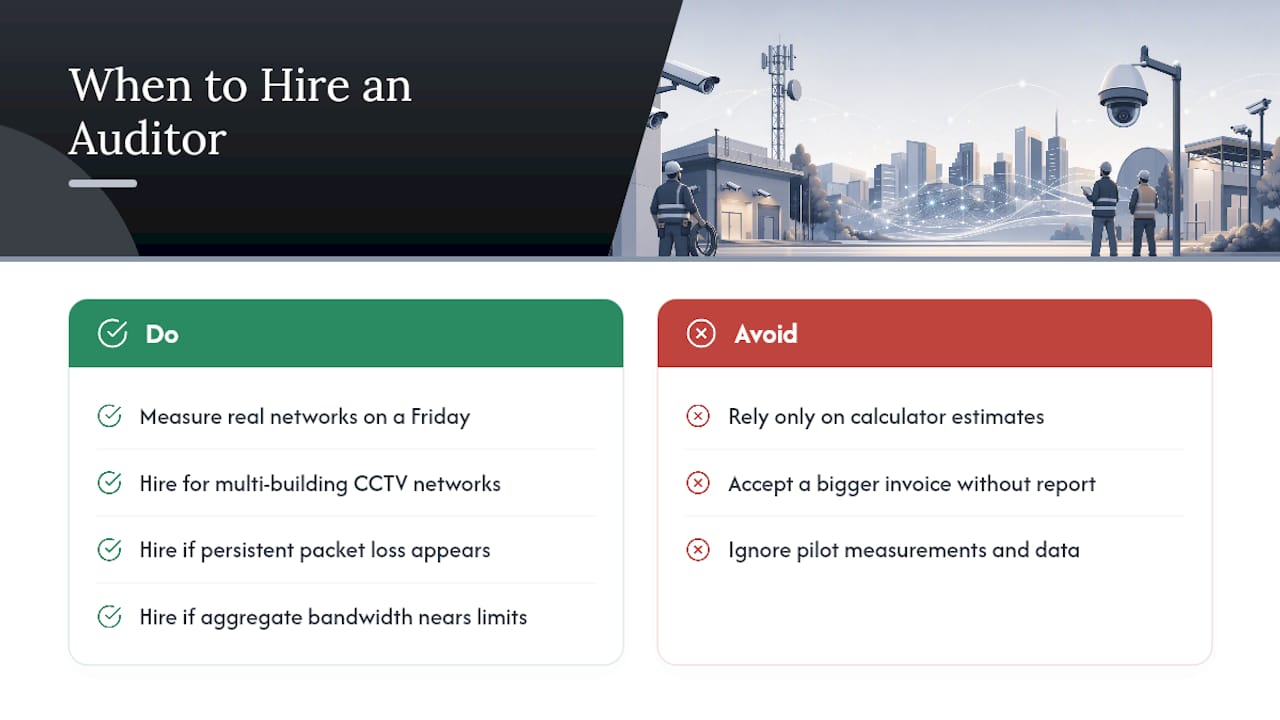
A key insight comes from measuring real networks on a Friday. The gap between a calculator’s estimate and a pilot’s measured numbers is usually where a project either succeeds or runs into packet loss six months later.
Hire a professional for multi-building CCTV networks, any deployment showing persistent packet loss, or when your aggregate bandwidth is closing in on switch or uplink limits. A proper audit delivers pilot measurements, a specific uplink and switch recommendation, and a written capacity report, not just a bigger number on an invoice.
— Aaron
Get a Bandwidth Audit Instead of Guessing
Calculators give you a starting number. On-site measurements confirm bandwidth needs, which matters most for South Florida properties where humidity, older wiring, and mixed analog-to-IP systems throw off every generic estimate. Instead of guessing at overhead percentages from a spreadsheet, you get a technician who pilots the actual cameras on the actual switch before recommending an uplink.

If your property still runs analog cameras or a patchwork of both, an analog-to-IP upgrade can cut per-camera bandwidth significantly just by moving to modern H.265 encoding. For properties spread across multiple buildings, multi-building CCTV network services handle the uplink and switch planning between sites, and where a wired connection between buildings isn’t practical, point-to-point Wi-Fi installation solves the same problem without trenching cable. Reach out through the site to schedule a site survey and get a written capacity recommendation before you buy a single switch.
Sources
For deeper reading: DHS’s video quality handbook covers measurement standards, Fortinet’s white paper details uplink planning, and CCTVplanner offers a free codec-aware calculator.
- CCTV Bandwidth Calculator — CCTVplanner
- How Much Bandwidth Does an IP Camera Use? — SurveillanceGuides
- CCTV Bandwidth Calculator — EngineersUniverse
FAQ
Is 30 Mbps Enough for CCTV?
For a small system of four to six 1080p cameras running H.265, 30 Mbps is usually enough, since each camera typically needs 1 to 2 Mbps.
Is 40 Mbps Upload Speed Good for a CCTV Camera?
A single camera never needs 40 Mbps. That speed supports a moderate multi-camera system, roughly 8 cameras at 1080p with H.265, once you’ve added overhead and a secondary viewing stream.
How Many Mbps Are Needed for CCTV Overall?
It depends entirely on camera count, resolution, and codec, but the working formula is: sum every camera’s average Mbps, add secondary streams, then multiply by 1.2 for overhead. An 8 camera 1080p system typically lands between 30 and 50 Mbps total.
How Much Bandwidth Do Security Cameras Use?
Individually, most security cameras use 0.5 to 8 Mbps depending on resolution and codec, with a typical 1080p camera on H.265 sitting around 1 to 2 Mbps. Scene complexity, frame rate, and I-frame interval can push that number up substantially during high-motion periods, which is why pilot testing matters more than any single spec sheet figure.