The right camera pole height is whatever height satisfies your near and far field-of-view requirements at the recognition distance you actually need, not a round number pulled from a spec sheet. In practice, that works out to a few common bands: 2.5 to 3 meters (roughly eight to ten feet) for identification shots at entrances, 6 to 8 meters (approximately twenty to twenty-six feet) for perimeter and overview coverage, and 10 to 13 meters (around thirty-three to forty-three feet) for stadium or event tiers. License plate recognition sits in its own narrow window, roughly 3.5 to 4.5 meters (around eleven and a half to fifteen feet). Once you land on a number, confirm it against pole deflection limits and check whether it crosses your municipality’s permit trigger, often around 3.7 m (12 ft).
TL;DR:
- The optimal pole height depends on specific coverage needs, with typical ranges from 2.5 meters for entrances to 13 meters for stadiums, considering wind and permit limits.
- Run precise geometry calculations incorporating near and far distances, surface elevation, tilt angle, and field of view to determine exact mounting height and coverage band.
- Wind loads and pole deflection standards, like H/150, must be factored into height choices, especially in open terrain or coastal areas, often requiring reinforcement or specialized materials.
- Foundations need to meet concrete strength, embedment ratio, and environmental conditions to support taller poles safely and prevent sway or failure.
- Conduct a site survey beforehand to confirm actual coverage, permit thresholds, environmental factors, and structural constraints, avoiding costly mistakes and adjustments after installation.
Table of Contents
- What Height Range Fits Your Camera Installation?
- How Do You Calculate the Right Mount Height?
- Why Do Wind Loads and Pole Deflection Limit Your Height Options?
- What Foundation and Installation Details Matter Most?
- How Does Pole Height Affect Maintenance and Permits?
- What a South Florida Installer Sees Go Wrong
- Can You Adjust Pole Height After Installation?
- How Do You Reduce Risk on Tall Pole Installations?
- Does Local Wildlife or Zoning Affect Your Height Choice?
- What the Height Debate Usually Gets Backwards
- Get a Site Survey Before You Order Any Pole
- Sources
What Height Range Fits Your Camera Installation?
Every camera pole height decision starts with one question: what do you need to see, and how clearly? A pole mounted too low invites vandalism and blocked sightlines. Mounted too high, you lose facial detail and pixel density on the thing you actually needed to identify.
Here’s how the ranges break down by application, based on common installer practice and parking lot design guidance:
- Residential entrances and porches: 2.5 to 3 meters (roughly eight to ten feet). Close enough for facial detail, high enough to resist casual tampering.
- Pedestrian paths and building entrances: around 3 m (10 ft), the same balance point scaled for commercial foot traffic.
- Drive aisles and parking rows: 4.5 to 6 meters (about fifteen to twenty feet), tall enough to clear box trucks and delivery vans without losing plate or driver detail.
- Perimeter and overview coverage: 6 to 8 meters (approximately twenty to twenty-six feet) for wide context, though deflection becomes a real concern at this height.
- Sports and event venues: 6 m for youth fields, 8 m for high school or club-level venues, and 10 to 13 m for stadium installs that need broadcast-quality analysis footage.
- License plate capture: 3.5 to 4.5 m with a steep downward tilt and a short, tightly controlled range to keep pixel density high enough for plate reads.
Notice the pattern: height goes up as the area you’re covering gets wider, and it comes back down whenever plate or face detail is the actual goal. A camera pole height guidelines chart that ignores that tradeoff is guessing, not designing.
How Do You Calculate the Right Mount Height?
Skip the guesswork and run the geometry. A mount-height calculator needs five inputs: your near distance (the closest point you must resolve), your far distance (the farthest point that still needs usable detail), the elevation of the mounting surface above grade, your planned tilt angle, and the camera’s vertical field of view.
The math behind most calculators, including the camera mount height tool at CodingAce, comes down to two ray equations:
- Calculate the height needed to cover your far distance: H_far = far distance × tan(top angle).
- Calculate the height needed to cover your near distance: H_near = near distance × tan(bottom angle).
- Take the larger of the two results, then compare it against your minimum clearance requirement. Whichever number wins is your recommended mount height.
Run this before you order hardware, not after. The output tells you three things: the mount height itself, the actual coverage band you’ll get at that height, and whether you’re clearing minimum pedestrian or vehicle clearance.
Pro Tip: Always add the mounting-surface elevation into your near-distance calculation, and build in a margin for seasonal vegetation growth or temporary obstructions like parked box trucks. Skipping that step is the single most common reason installers end up with a blind spot six months after commissioning.
Why Do Wind Loads and Pole Deflection Limit Your Height Options?
A pole that sways even a few degrees at the top can turn a stadium-tier install into unusable footage, because that motion gets magnified across the entire optical path. That’s why manufacturer deflection charts matter more than the height number on your cut sheet. Standards like the WSDOT camera pole specification commonly cite a maximum horizontal top deflection of H/150, meaning an 8 m pole shouldn’t sway more than roughly 5.3 cm at the top under design wind load.
Wind exposure category changes everything about how a pole needs to be built. Exposure B (urban, sheltered) allows a lighter design than Exposure C (open terrain) or Exposure D (coastal, unobstructed). A pole that performs fine in a fenced suburban lot can fail spec on an open coastal property at the same height.
A few things to check before you finalize a spec:
- Request the manufacturer’s deflection chart for your exact pole diameter, wall thickness, and height combination.
- Confirm the embedment depth follows at least a 1:4 ratio (depth to above-grade height) as a baseline, increasing it in high-wind zones.
- Compare aluminum, galvanized steel, and FRP options. Coastal and high-corrosion sites usually favor FRP or properly galvanized steel over standard aluminum.
For anything above roughly 7 m, or any installation on critical infrastructure or public right-of-way, bring in a structural engineer who can run the overturning moment calculation properly rather than relying on rule-of-thumb sizing.
What Foundation and Installation Details Matter Most?
Your height calculation is only as good as the foundation holding the pole up. Three anchor methods dominate the market: bolted baseplates on a poured pier, direct-burial poles set straight into concrete, and helical piers, which install faster and often outperform poured footings in unstable or sandy soil.
A few field-tested minimums worth locking into your spec before a crew breaks ground:
- Use at least 3,000 psi concrete as a baseline strength, with full curing time before the pole carries load.
- Install dual ground rods and surge protection on any pole feeding camera or network electronics, especially in lightning-prone regions.
- Plan cable conduit routes early. Taller poles mean longer vertical runs and more conduit, which adds materially to labor time. Our wiring installation guide walks through what that routing actually involves.
- Confirm the site is clear of emergency access lanes, underground utilities, and right-of-way restrictions before digging.
Get the footing wrong and no amount of correct height math will save the install.
How Does Pole Height Affect Maintenance and Permits?
Every extra foot of height adds to your long-term maintenance bill, not just your install invoice. Poles above roughly 4.5 to 5 m usually require a lift or specialized crew for lens cleaning, re-aiming, or hardware swaps, and that cost repeats every time something needs adjustment.
Permit thresholds vary by municipality, but engineered drawings commonly get triggered around 3.7 m (12 ft), or automatically whenever the pole sits in a public right-of-way. Some jurisdictions also want proof of contractor licensing and liability coverage before sign-off. Our Florida camera compliance guide is a useful example of how granular these local rules can get.
- Budget lift rental or bucket-truck time into any pole above 5 m before committing to that height.
- Check your local permit threshold before ordering hardware, not after.
- Confirm your contractor’s insurance covers elevated work if the install goes above standard ladder height.
Pro Tip: If you expect to re-aim or service the camera more than once a year, favor the lowest height that still meets your coverage requirement. Accessibility saves more money over five years than the extra reach ever does.
What a South Florida Installer Sees Go Wrong
The mistakes that repeat most often aren’t exotic. Crews forget to add mounting-surface elevation into their near-distance math, underestimate how much a coastal wind exposure category changes footing requirements, or dig a footing shallow because the pole “looked fine” on paper.
One retrofit pattern comes up often enough to name: a property installs a slender pole at height, gets usable footage for a few months, then starts seeing motion blur during storm season. The fix is rarely a new camera. It’s usually a thicker-walled pole and a deeper footing, the same upgrade path documented in real-world retrofits where switching to a larger-diameter pole with reinforced footings resolved the sway.
A pole spec that skips the deflection chart is a bet that the wind report was wrong. Most of the time it wasn’t.
Before ordering any pole, run a site survey, sketch your actual field of view, write down your maintenance expectations, check the local permit threshold, and request the deflection chart in writing. Lowvoltagecorp handles this survey work directly for property managers across South Florida who want it done once, correctly.
Can You Adjust Pole Height After Installation?
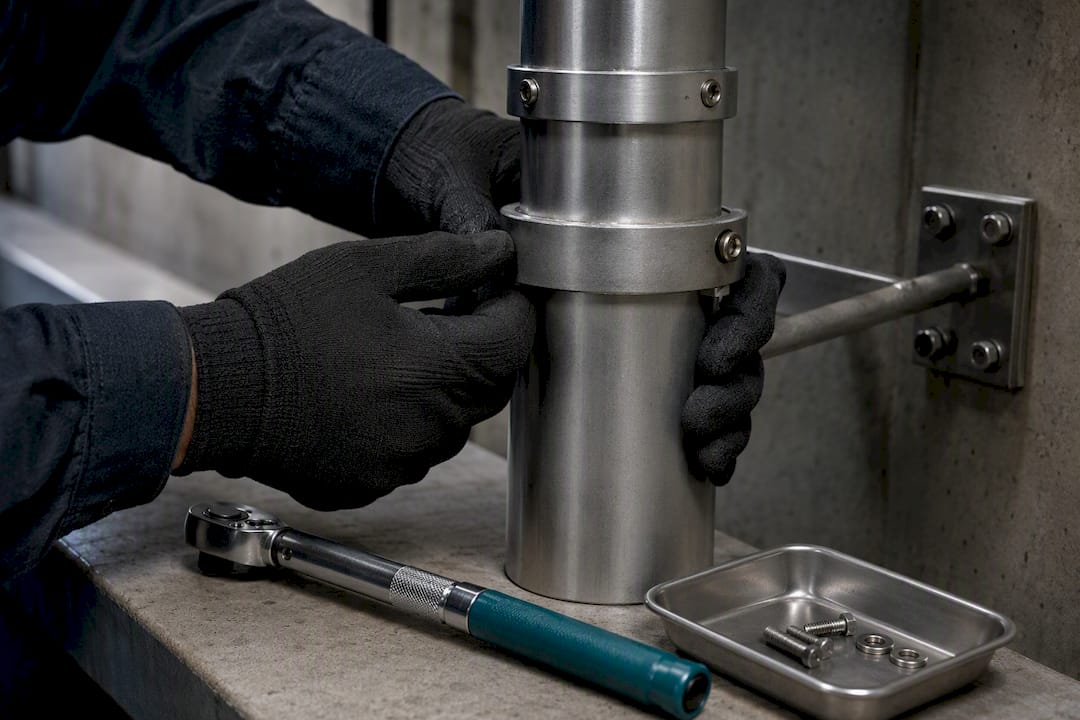
Fixed poles lock you into a decision made before you had real-world footage to evaluate. Telescoping and adjustable-height poles solve that by letting you raise or lower the camera mount within a set range, often 1 to 2 m of adjustment, without re-pouring a footing.
That flexibility matters most in three situations: temporary event coverage where the venue layout changes year to year, construction sites where sightlines shift as the build progresses, and pilot installations where you’re not yet certain the initial height nailed the coverage you needed. A telescoping mast lets a facility manager test 5 m, find it’s slightly short on far-field detail, and crank it up to 6 m without touching the base.
The tradeoff is stiffness. Telescoping sections introduce more joints, and every joint is a potential point of sway under wind load. A fixed pole of the same height will almost always outperform a telescoping one on deflection, so telescoping models make more sense for lower-risk, lower-wind applications than for a stadium-tier perimeter pole exposed to open coastal wind.
If you’re deploying across multiple sites with different coverage needs, standardizing on one adjustable pole model can also simplify inventory and reduce the number of custom fixed-height orders you have to spec and track. For most permanent security installations, though, a fixed height chosen correctly the first time remains the more stable and lower-maintenance option.
How Do You Reduce Risk on Tall Pole Installations?
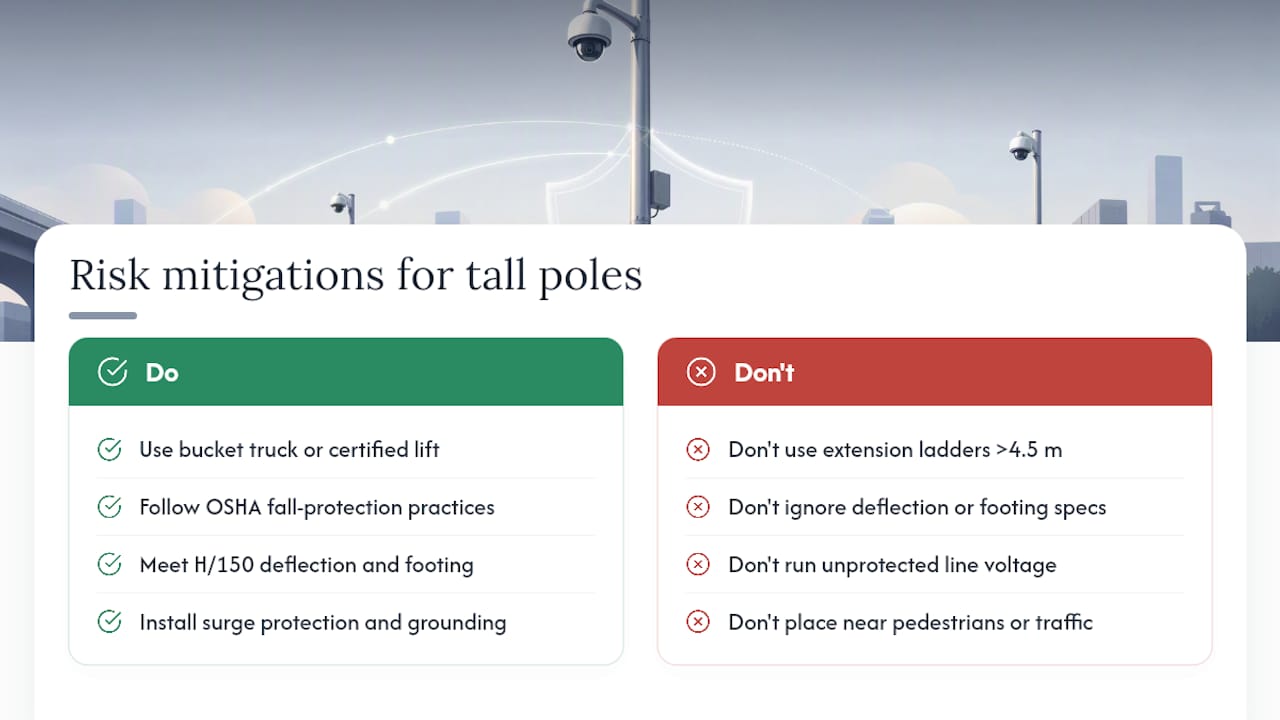
Height introduces risk categories that don’t exist at ground level: fall hazards during install and service, wind-driven pole failure, and electrical hazards from running power up an exposed structure. None of these are reasons to avoid height when the job genuinely calls for it, but each needs a specific mitigation, not a general one.
Fall protection during installation and maintenance is non-negotiable above standard ladder height. Crews working on poles taller than roughly 4.5 m should use a bucket truck or certified lift rather than extension ladders, and any work above that height should follow OSHA fall-protection practices for elevated work.
Wind-driven failure risk ties directly back to the deflection and embedment specs covered earlier. A pole that meets its H/150 deflection target and has adequate footing depth for its exposure category is a pole that won’t come down in a storm that was actually accounted for in the design.
Electrical safety matters more as poles get taller because the run from ground-level power to the camera head gets longer and more exposed. Surge protection at both ends of that run, proper grounding, and weatherproof conduit are not optional extras on any pole feeding line voltage or PoE equipment.
Finally, consider what happens if the pole does fail. Placement away from pedestrian paths, parking spaces, and vehicle travel lanes limits the consequences even if a structural or wind event does occur. That placement decision costs nothing at design time and matters enormously if conditions ever exceed the design assumptions.
Does Local Wildlife or Zoning Affect Your Height Choice?
Height decisions don’t happen in a vacuum. Local ordinances in many municipalities cap structure height in residential zones, and a pole that clears the permit-engineering threshold discussed earlier may still violate a separate zoning height limit that has nothing to do with structural safety.
Wildlife considerations show up more often than most property managers expect, particularly near wetlands, coastal areas, or anywhere migratory birds nest. Utility and communications poles have documented histories of bird collision and nesting interference, and some jurisdictions require deterrent hardware or specific siting distances from known habitat areas on any new pole structure. Checking local wildlife agency guidance before finalizing a site plan avoids a costly relocation after the footing is already poured.
Coastal properties add another layer: salt exposure accelerates corrosion, which is part of why material selection (aluminum versus galvanized steel versus FRP, covered earlier) becomes as much an environmental decision as a structural one. A pole spec that ignores salt air exposure in a coastal zoning district often needs replacement years ahead of its rated lifespan.
None of this should scare a property manager away from the height their coverage actually requires. It just means the environmental review belongs in the same conversation as the structural review, not as an afterthought after the pole is already ordered.
What the Height Debate Usually Gets Backwards
Most guidance on this topic treats height as the primary decision and engineering as an afterthought, a checklist item you handle once the number is picked. That ordering is backwards. Height is the output of a coverage calculation, and the engineering constraints, deflection, wind exposure, embedment, are what tell you whether that output is actually buildable at a given site.
The industry also tends to oversell extreme heights as a universal fix for coverage gaps. A taller pole covers more ground, sure, but it also multiplies your maintenance cost, your permit complexity, and your structural risk simultaneously. In most parking lot and perimeter jobs, the correct answer sits closer to 6 m than to 10 m, and pushing higher just because a wider lens angle sounds more thorough tends to trade image quality for a marginal footprint gain.
If there’s one thing worth prioritizing above the rest, it’s requesting the deflection chart before the pole is ordered, not after installation reveals a sway problem. Everything else, embedment depth, material choice, permit timing, follows naturally once that number is confirmed.
— Aaron
Get a Site Survey Before You Order Any Pole
A practical alternative to guessing at a height number off a spec sheet is to run the site survey, sketch the actual field-of-view requirements, check permit thresholds, and confirm footing and deflection specs before a single pole gets ordered.

That process covers the full install lifecycle: site survey, engineering-ready drawings where required, footing and embedment prep, the physical install, and final testing of camera aim and grounding. Surge protection and grounding are built into the install, not sold as an add-on afterward, and permit coordination can be handled as needed.
If you manage a property in South Florida and want a height and coverage plan confirmed before you spend money on poles or cameras, request a site survey and quote and get a plan that fits your actual coverage requirements, not a guess.
Sources
- Type CCTV Traffic Signal Standard (Camera Pole) — WSDOT
- Camera mount height calculator — CodingAce
- How to design a security camera system for parking lots (Pole Placement, Height & Coverage) — Lightmart