Cover your entry points first. Every front door, back door, and garage should have a camera positioned to capture a face at the moment someone approaches, not after they have already reached the handle. Once those priority zones are locked down, extend coverage to driveways and vehicle approaches, then fill remaining gaps around the yard and interior circulation paths.
The numbers to remember: mount outdoor cameras 8 to 10 feet high, indoor cameras 7 to 9 feet, and tilt every lens downward by a moderate angle to capture faces clearly and avoid sky or ground dominance so faces land in the lower two-thirds of the frame.
Before you drill a single hole, do three things:
- Open the camera’s app and check the live view from the exact mounting spot.
- Test Wi-Fi signal strength (or run a PoE cable check) at that location.
- Sketch your property and mark where each camera’s field of view overlaps the next one by 10 to 20%.
Key Takeaways
Camera placement succeeds when entry points get priority coverage, mounting height and tilt follow the 8 to 10 foot outdoor and 7 to 9 foot indoor rule, and every camera’s live view gets tested before the first hole is drilled.
| Point | Details |
|---|---|
| Entry points come first | Cover front door, back door, and garage before adding yard or perimeter cameras. |
| Follow height and tilt numbers | Mount outdoor cameras 8 to 10 feet, indoor 7 to 9 feet, tilted 15 to 30 degrees down. |
| Build in overlap | Plan 10 to 20% overlap between adjacent camera views to close blind spots. |
| Test before you drill | Check live view, Wi-Fi strength, and night performance from the exact mounting spot. |
| Get professional placement and wiring | Lowvoltagecorp installs and maintains zone-first camera systems for South Florida homes and businesses. |
Table of Contents
- Exterior Camera Placement Guidelines for Doors, Driveways, and Yards
- Where Should Interior Cameras Go?
- Getting the Technical Setup Right
- Privacy Boundaries: Where Not to Put a Camera
- Common Placement Mistakes and a Quick Pre-Mount Checklist
- Wiring, Mounting, and Maintenance Tips From the Field
- What Most Placement Advice Gets Wrong
- Get Camera Placement Done Right the First Time
- Sources
Exterior Camera Placement Guidelines for Doors, Driveways, and Yards
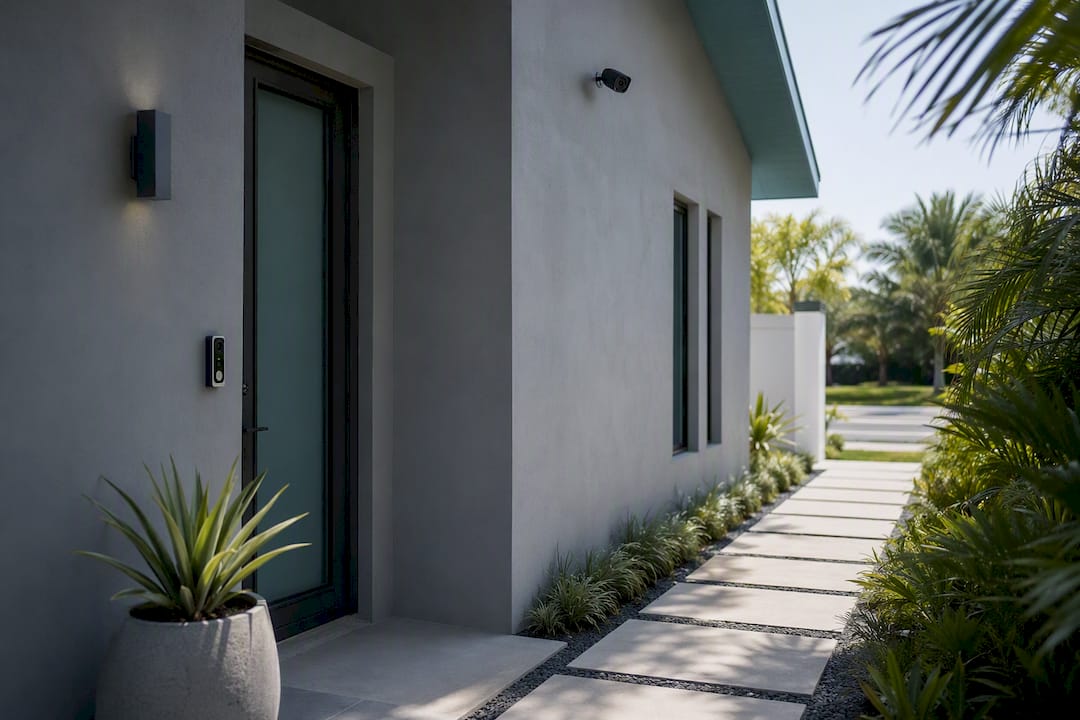
Outdoor coverage works best as a layered system, not a single wide shot that tries to do everything. Start at the front door: pair a doorbell camera mounted at typical chest-to-face height for optimal capture with a second, elevated camera at 8 to 10 feet angled down 15 to 20 degrees. The doorbell catches close detail and package activity; the elevated unit catches the approach and anyone standing off to the side, out of the doorbell’s narrow frame.
Driveways demand a different lens strategy entirely. If you want a readable license plate, a wide-angle lens will disappoint you every time. Use a narrower field of view or a varifocal lens, mount it 8 to 10 feet up, and angle it to avoid direct headlight glare washing out the image at night. Security.org’s placement research consistently flags driveways as an afterthought in DIY setups, which is exactly why so many break-in videos show a car but never a plate.
Garages and side doors matter more than most homeowners assume. A garage entry that connects to the house interior is effectively a second front door, and it should get the same approach coverage plus an interior view of the entry itself. Where two exterior walls meet at a corner, overlapping coverage from adjacent cameras closes the gap a single camera would leave.
For yard and perimeter coverage, corner mounts around 9 feet work for most residential lots. Larger commercial properties or irregular yards often benefit from a pan-tilt-zoom camera that can follow activity across a wider stretch of ground. Whatever the layout, security-industry placement guidance recommends building in 10 to 20% overlap between adjacent fields of view so a blind spot never opens between two cameras that are technically “covering” the same area.
A few mounting details separate a clean install from a frustrating one:
- Use standoff brackets under soffits and overhangs to keep the lens clear of infrared reflection off nearby surfaces.
- Route cable or conduit before finalizing camera position, not after.
- Choose tamper-resistant housings for any camera within reach from the ground.
Pro Tip: Walk your property at the exact time of day you expect the most activity, then check the sun’s position. A camera that looks perfect at noon can be a silhouette-only disaster at 6 p.m. when the sun sits directly behind your target.
Where Should Interior Cameras Go?
Interior placement follows a simpler rule than most people expect: cover the paths people walk, not the rooms where they live. High corners at 7 to 9 feet give you the widest field of view and put the camera out of easy reach, which cuts down on tampering.
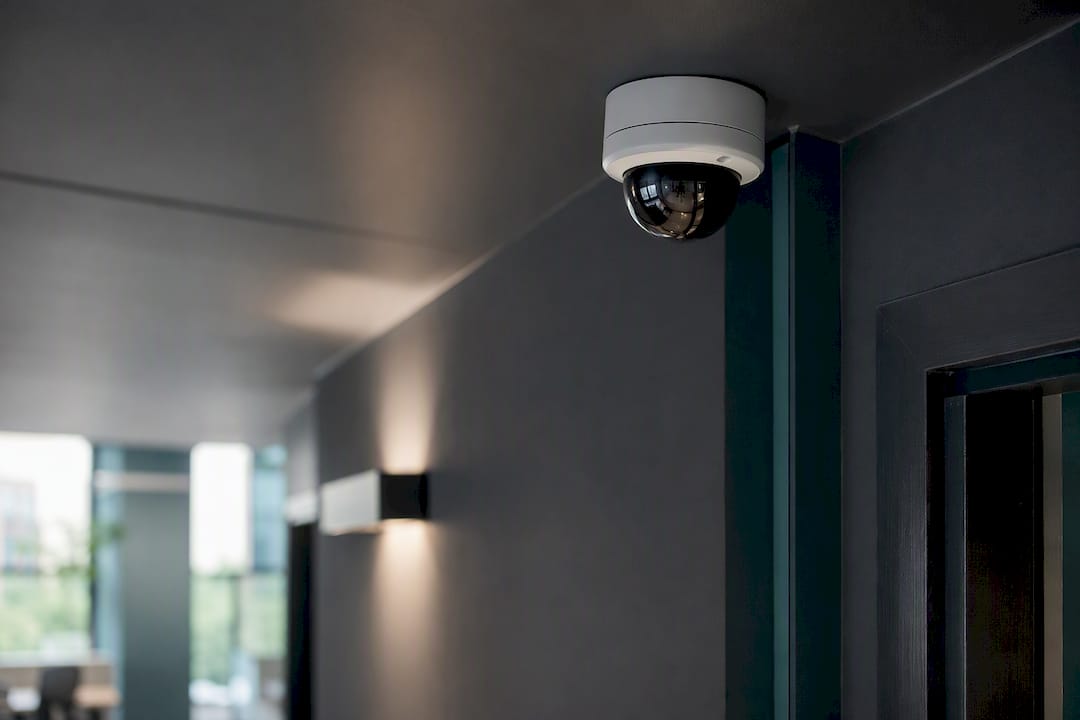
Hallways, stairwells, and the interior side of any exterior entry point are the highest-value spots. A camera watching the top of a staircase or the mudroom door tells you far more about who is moving through a property than one aimed at a couch. Skip bedrooms and bathrooms entirely. Beyond the obvious privacy concerns, they add nothing to a security plan built around entry and circulation.
Window placement trips up a lot of first-time installers. Pointing a camera directly at a window during the day usually produces a blown-out, backlit frame where every subject appears as a dark outline. Angle the shot from the side or slightly overhead instead, which keeps the exposure balanced and still catches anyone passing through.
Camera type should match the space. A dome or turret camera works well in an open living area where you want discretion and a wide view. A narrow-angle bullet camera is the better call for a long hallway or stairwell, where you need reach down a corridor rather than breadth across a room.
Getting the Technical Setup Right
Height, angle, and lens choice are not style preferences. They determine whether your footage can actually identify someone months later or just confirms that “a person” was there.
- Set height and tilt correctly. Outdoor cameras belong at 8 to 10 feet, indoor at 7 to 9 feet, both tilted 15 to 30 degrees down so faces occupy the lower two-thirds of the frame rather than getting lost near the top edge.
- Match the lens to the distance. A 2.8mm lens suits a wide porch view where you want context. A 4mm lens fits a medium-distance driveway shot. Long driveways or dedicated plate capture call for a varifocal lens you can adjust after mounting.
- Check pixel density, not just resolution. A 4K camera aimed at a spot 60 feet away can still produce useless footage if the pixels per foot at that distance fall too low. Industry identification standards from groups like SIA and NIST point to roughly 40 pixels per foot as the target for reliable identification, which means a 1080p camera mounted close often beats a 4K camera mounted far.
- Plan overlap deliberately. Draw your camera cones on a simple site sketch and look for gaps before you mount anything. A 10 to 20% overlap between adjacent cameras eliminates the blind corridors that show up only after an incident, when it is too late to fix them.
- Test connectivity before you drill. Open live view in the camera’s app from the exact mounting spot, confirm three or four bars of Wi-Fi signal (or a clean PoE run for wired cameras), and verify the base station’s range if you are using a wireless system.
- Account for night performance separately from day performance. Backlit scenes, IR bounce off nearby surfaces, and headlight glare are the most common reasons footage that looks fine at noon turns unusable at midnight. A WDR or HDR-capable camera handles the contrast between a dark yard and a bright porch light far better than a standard sensor.
Motion zone tuning deserves its own pass. Side-to-side motion across the frame triggers most sensors more reliably than motion heading straight toward or away from the lens, a detail Arlo’s own placement guidance confirms after years of false-alert complaints tied to busy streets and windblown trees.
Privacy Boundaries: Where Not to Put a Camera
Good camera placement is as much about restraint as it is about coverage. Bedrooms, bathrooms, and any changing area are off-limits, full stop. So is any angle that sweeps deep into a neighbor’s yard or window rather than staying within your own property line.
Keep your field of view tight enough that it documents your property, not the street corner or the house next door. A camera with too wide a lens pointed at a shared fence line invites a conversation with a neighbor you would rather not have.
Audio is its own category of risk. Recording laws vary by state, and some require consent from all parties before audio capture is legal. Check your local and state rules before enabling audio, and when in doubt, leave it off.
- Use privacy masking or exclusion zones to black out a neighbor’s window or a public sidewalk within your camera’s frame.
- Post signage for monitored areas where local rules require it or where it simply reduces disputes.
- Review your camera app’s software settings for zone exclusion rather than assuming default settings already handle it.
Common Placement Mistakes and a Quick Pre-Mount Checklist
Most placement failures trace back to five repeat offenders: mounting too high to capture a usable face, angling a lens at open sky or a window, IR glare bouncing off a soffit, weak Wi-Fi at the mounting point, and gaps left between cameras that should overlap.
Before you commit to a final mount, run through this:
- Test live view in both daylight and after dark.
- Confirm Wi-Fi signal strength or a clean PoE connection at the exact spot.
- Check tilt angle so faces land in the lower two-thirds of frame, not the top edge.
- Look for reflections or glare off nearby glass, metal, or painted surfaces.
- Verify the mounting hardware resists casual tampering.
For a typical single-family home, four to six cameras usually cover every entry point, the driveway, and one or two yard corners. Larger properties, multi-entry buildings, or commercial sites with loading areas and multiple access points often need six or more to close every gap.
Pro Tip: If you can only afford to fix one weak spot in an existing system, fix the driveway camera first. It is the single most common blind spot we see on service calls, and it is usually the one piece of footage a property owner actually needs after an incident.
Wiring, Mounting, and Maintenance Tips From the Field
A camera aimed perfectly still fails if the wiring behind it is an afterthought. PoE runs simplify power and data into one cable, but every run needs proper conduit protection against South Florida heat and humidity.
- Seal every exterior junction point against moisture; corrosion kills more outdoor cameras than lens damage does.
- Use standoff brackets to keep IR illuminators from washing out against nearby surfaces.
- Choose tamper-resistant fittings on any camera within arm’s reach.
- Run a simple monthly check: live view clarity, motion trigger response, and physical mount stability.
Full wiring specifics live in our security camera wiring guide, and ongoing troubleshooting steps are covered in our repair workflow for property managers.
What Most Placement Advice Gets Wrong
Most placement guides treat every camera position as equally important, which leads readers to spread their budget and effort evenly across a property instead of concentrating it where incidents actually happen. That is backwards. The research on choke points and thief behavior is consistent: attackers target specific entry paths, not random corners of a yard, and your camera plan should mirror that reality rather than symmetry.
The other overrated idea is that more cameras automatically mean better security. A property with eight poorly aimed cameras often has worse footage than one with five cameras placed at the right height, angle, and overlap. Coverage quality beats coverage quantity almost every time we review a system that failed to produce usable footage after an incident.
If you take one thing from this guide, prioritize the front door, the garage, and the driveway before spending another dollar on yard cameras. Those three zones account for the overwhelming majority of usable evidence in real incidents, and they are the zones DIY installers most often under-mount or misangle.
Get Camera Placement Done Right the First Time
Reading a placement guide gets you most of the way there, but pixel density calculations, IR bounce troubleshooting, and PoE cable runs are exactly where DIY installs go sideways. Lowvoltagecorp handles installation, repair, and maintenance of security camera systems for homes and businesses across South Florida, and we build every layout around the same zone-first approach covered here: entry points first, then vehicle approaches, then full-perimeter overlap.

Where this guide gives you the rules, our technicians handle the variables no article can predict: your property’s specific sightlines, your existing network capacity, and the wiring path that avoids the six mistakes above. Our security camera wiring installation guide covers what a full professional setup includes, and if you already have a system that needs a placement audit or a repair, our camera repair workflow for property managers outlines how we diagnose blind spots and connectivity failures. Contact Lowvoltagecorp for a placement assessment and quote on your property today.
Sources
- Nest support: Camera placement and testing (live view)
- Where to Place Your Home Security Camera
- Security Camera Placement Guide for Homes and Businesses
Recommended
- Lighting Considerations for Surveillance: A Pro Guide – Low Voltage Corp
- Types of Wireless Networks: A Home and Business Guide – Low Voltage Corp
- Cell Booster Installation Tips for South Florida Homes – Low Voltage Corp
- Best Cell Boosters for Facilities: Commercial Picks & Install – Low Voltage Corp