Run your security system checklist in this order: control panel and backup power first, then cameras and recording, access control and locks, sensors, exterior lighting, fire and life-safety devices, network and connectivity, and finally documentation. Do that sequence monthly at minimum, with lighter daily and weekly spot-checks in between, and a full professional inspection once a year.
Here’s the quick-reference list you can print or copy right now:
- Control panel / hub: power indicator green, backup battery charged, time/date correct
- Cameras: all feeds live, mounts secure, lenses clean, night mode functional
- DVR/NVR: recording active, storage not full, retention period set to a typical range
- Locks and access control: deadbolts operate smoothly, electronic readers respond, user list current
- Sensors: door/window contacts seated, motion detectors unobstructed, batteries checked
- Exterior lighting: motion lights trigger correctly, no glare into camera lenses
- Smoke/CO detectors: test button passes, battery backup present
- Network/power: UPS healthy, PoE switch ports within load, cellular backup confirmed
- Documentation: inspection log updated, firmware versions recorded, photos taken
Run the full list monthly. Daily, just confirm your app shows all devices online and no unresolved alerts. Weekly, glance at camera feeds and check the UPS status light. Quarterly, push firmware updates and audit user accounts. Annually, bring in a licensed technician for a complete system review.
Table of Contents
- What does a good maintenance schedule actually look like?
- How do you test your control panel, DVR/NVR, and keypads?
- What should you check on cameras and recording systems?
- How do you inspect locks and access control systems?
- How do you test door, window, motion, and glass-break sensors?
- Are your exterior lights actually helping your cameras?
- What fire and life-safety checks belong on your security inspection?
- How do you verify power, network, and cellular backup?
- How do you run a repeatable system test with pass/fail criteria?
- What operational habits keep a security system effective day to day?
- What should your inspection log include?
- What are the most common security system problems and how do you fix them?
- When should you hire a professional, and what will they actually do?
- Key Takeaways
- What installers actually see in the field
- Lowvoltagecorp can handle your inspection, maintenance, and repairs
- Authoritative sources and further reading
What does a good maintenance schedule actually look like?
Turning a one-time checklist into a habit is where most homeowners and managers fall short. The table below maps each task to a frequency and the person best positioned to handle it.
| Task | Frequency | Who |
|---|---|---|
| Confirm all devices show online in app | Daily | Homeowner / staff |
| Review unresolved alerts | Daily | Homeowner / manager |
| Spot-check camera feeds (key zones) | Weekly | Homeowner / manager |
| Check UPS status indicator | Weekly | Homeowner / manager |
| Test backup power under load | Monthly | Homeowner / manager |
| Inspect sensor batteries | Monthly | Homeowner / manager |
| Review storage usage and retention settings | Monthly | Homeowner / manager |
| Verify cellular backup failover | Monthly | Homeowner / manager |
| Push firmware updates (cameras, NVR, panel) | Quarterly | Manager / vendor |
| Audit user accounts and remove stale credentials | Quarterly | Manager |
| Full walk-through inspection with test procedures | Quarterly | Manager / vendor |
| Professional inspection and SMART drive analysis | Annual | Licensed technician |
| System-wide inventory and hardware evaluation | Annual | Licensed technician |
Routine security equipment maintenance prevents most of the failures that lead to expensive emergency calls. Systems that go several years without a hardware review tend to accumulate problems: unsupported sensors, outdated firmware, and hardware that shows signs of needing an upgrade like frequent false alarms and slow app communication.
How do you test your control panel, DVR/NVR, and keypads?
The control panel is the brain of the system. If it’s misconfigured or running on a dead backup battery, everything downstream is unreliable.
- Check the power indicator. The panel should show a solid green “AC power” light. A flashing or amber light usually means the backup battery is low or the AC connection is interrupted.
- Test the backup battery. Disconnect AC power briefly and confirm the panel stays active. Reconnect immediately after confirming. Note the battery voltage if your panel displays it; most sealed lead-acid backups should read above 12V under load.
- Verify time and date. NVRs and DVRs with incorrect timestamps produce footage that’s useless in court. Confirm NTP sync is enabled and the displayed time matches your phone.
- Test arming and disarming. Arm in “away” mode, wait for the exit delay to expire, then trigger a door sensor. Confirm the alarm sounds and the monitoring center receives the signal within the expected time window.
- Test the panic button. Hold it for the required duration and confirm the monitoring center calls back or dispatches.
- Check firmware status. Log into the panel’s admin interface and compare the installed firmware version against the manufacturer’s current release. Firmware updates and credential hygiene are among the most frequently skipped items on any security configuration checklist.
- Audit admin credentials. Default usernames and passwords should have been changed at installation. If they haven’t, change them now.
Pro Tip: Before rebooting a panel, call your monitoring center and place the system on test mode. This prevents a false dispatch during the reboot cycle. Most centers allow a 30-minute test window.

What should you check on cameras and recording systems?
Physical and optical inspection
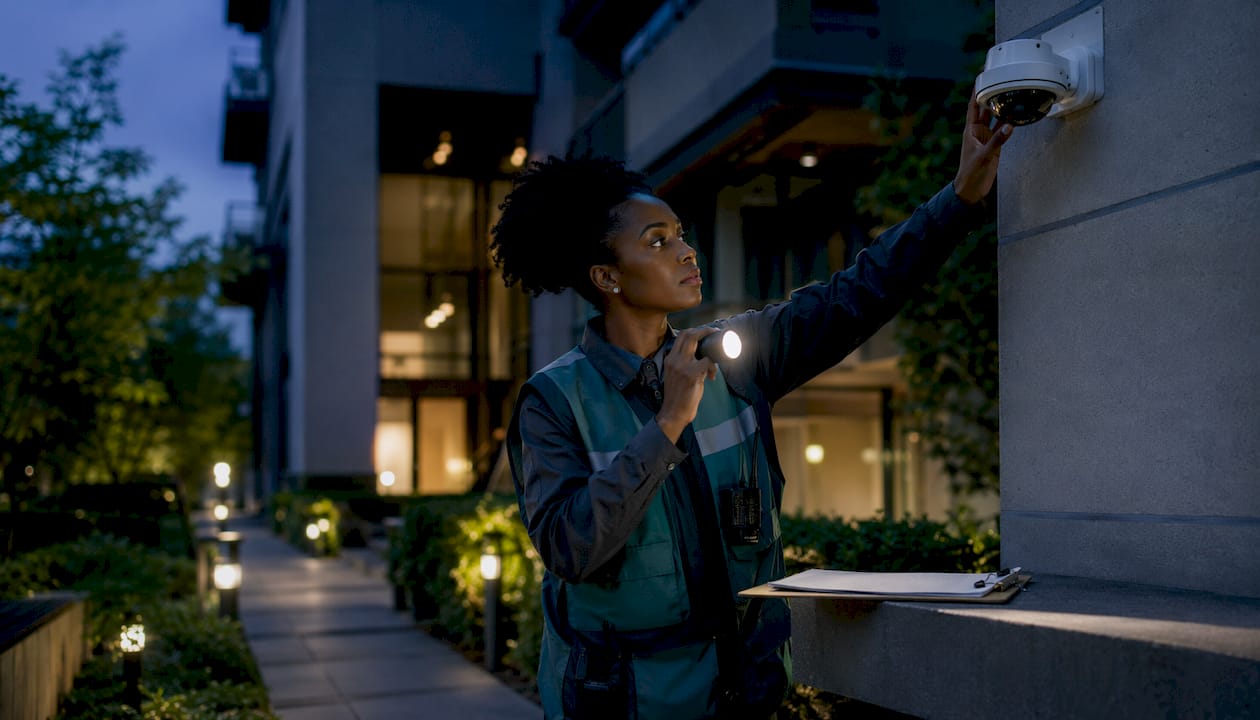
Start at the camera itself, not the screen. Walk to each unit and check:
- Mount screws are tight and the housing hasn’t shifted since the last inspection
- Lens is clean (use a microfiber cloth, not paper towels)
- Cable entry point has a drip loop and no exposed jacket cracking
- Vandal-resistant housing shows no signs of tampering or impact damage
Then go back inside and pull up the live feed. Walk the property at different times of day to catch glare, IR reflection off walls, and obstructions that only appear in certain lighting conditions. A camera that looks fine at noon may be blinded by headlights at 10 PM.
Recording and storage checks
- Confirm every channel is actively recording, not just displaying a live feed
- Check NVR/DVR storage usage; if it’s above 80%, either expand storage or shorten the retention window
- Verify the overwrite policy is set correctly so old footage rolls off rather than halting recording when the drive fills
- Run a SMART drive health check quarterly. Quarterly SMART monitoring catches early signs of drive failure before recordings are lost
- For cloud-synced systems, confirm the last successful sync timestamp
Resolution matters for what footage can actually prove. A 4MP camera is sufficient for identifying faces; 8MP is worth the storage cost at entry points where license plates need to be readable. Use continuous recording for high-traffic zones and motion-triggered recording for quieter areas to keep storage manageable.
Pro Tip: Run a “ghost” inventory every quarter: export the full device list from your NVR and compare it against your physical camera log. Untracked cameras running default credentials are one of the most common entry points for unauthorized access.
How do you inspect locks and access control systems?
Mechanical hardware
- Test every deadbolt: it should throw fully and retract cleanly with no binding
- Check strike plates for loose screws; a strike plate held by short screws is the most common mechanical failure in residential break-ins
- Inspect door frames for cracks or separation at the jamb, especially on exterior doors
- Lubricate lock cylinders and hinges with a dry lubricant (not WD-40, which attracts debris)
Electronic readers and door hardware
- Present a valid credential to each reader and confirm the relay activates within one second
- Test forced-entry detection: hold a door open past the “door held open” timer and confirm the alarm triggers
- Check magnetic lock holding force visually (look for proper door-to-frame contact) and confirm the fail-safe or fail-secure setting matches your life-safety requirements
- Inspect electronic lock hardware for corrosion, especially on exterior readers exposed to humidity
User and credential hygiene
- Pull the full user list and flag any account that hasn’t been used in 90 days
- Remove credentials for anyone who no longer works at or lives in the property
- Limit super-admin roles to a small number of people; every additional admin is an additional attack surface
- Rotate shared PIN codes quarterly, or immediately after a staff departure
How do you test door, window, motion, and glass-break sensors?
Sensors are the most numerous devices on most systems, and the most neglected. A dirty or displaced sensor produces false alarms; a failed one produces silence when you need a signal.
- Visual inspection first. Check that every sensor is flush against its mounting surface. A door sensor that’s shifted even a few millimeters may not register a closed state correctly.
- Clean the housing. Dust and spider webs on a passive infrared (PIR) motion sensor reduce its detection range. Wipe the lens cover with a dry cloth.
- Test door and window contacts. Open each protected door or window while the system is armed in test mode. Confirm the panel logs the zone as tripped.
- Walk-test motion sensors. Most panels have a walk-test mode that chimes or flashes when a PIR detects movement. Walk through each sensor’s coverage zone at the edges, not just the center, to confirm full coverage.
- Check sensitivity settings. If you’re getting nuisance alarms from pets, adjust the PIR sensitivity or switch to a pet-immune lens rated for the animal’s weight. Don’t just mask the zone.
- Battery check. Most wireless sensors report battery status to the panel. Any sensor showing “low battery” should be replaced within the week, not the month. Lithium cells in door contacts typically last multiple years; replace them on a schedule rather than waiting for a low-battery alert.
Are your exterior lights actually helping your cameras?
Lighting and cameras work together or against each other, depending on placement. A motion light aimed directly at a camera lens creates a blown-out image exactly when you need detail most.
- Check every exterior fixture: bulb operational, housing sealed against moisture, aim directed at the approach zone rather than the camera
- LED fixtures are the right choice for camera-adjacent lighting; they reach full brightness instantly and don’t produce the warm color shift that throws off white balance on color-night-vision cameras
- Test motion-activated lights at night by walking through their trigger zone. Confirm the sensitivity isn’t set so high that passing cars or tree branches trigger them constantly
- Walk the perimeter and note any shrubs or landscaping that’s grown tall enough to provide concealment near windows, doors, or gate approaches. Trim anything that creates a hiding place within 10 feet of an entry point
- Check photocell sensors on dusk-to-dawn fixtures; a failed photocell leaves lights on all day or off all night
Pro Tip: Keep two spare bulbs and a photocell on hand for each fixture type on the property. Exterior lighting failures at night are not a next-business-day problem.
For camera placement relative to lighting, Lowvoltagecorp’s guide on lighting for surveillance covers the specific angles and lumen ranges that work without washing out footage.
What fire and life-safety checks belong on your security inspection?
Security inspections and life-safety checks overlap more than most people realize. A monitoring center that receives a fire signal needs the same verified path as a burglar alarm.
- Test every smoke detector using the test button; the alarm should sound within a few seconds. Replace any unit that doesn’t respond or that’s more than 10 years old
- Test CO detectors the same way. The CPSC recommends CO alarms on every level of the home and outside sleeping areas
- Verify the fire alarm panel (in commercial properties) shows no trouble conditions and that NAC circuits are active
- Confirm fire signals reach the monitoring center by placing the system on test and triggering a smoke detector; the center should log the event
- Check every fire extinguisher: pressure gauge in the green zone, pin intact, no visible corrosion or damage, and inspection tag current per NFPA guidance
- Never disable a smoke or CO detector for testing without first notifying your monitoring center and following local fire code. Some jurisdictions require advance notice to the fire department
How do you verify power, network, and cellular backup?
A camera system that goes dark during a power outage is a liability, not an asset. The same storm that cuts power is often the same event that triggers a break-in.
- Check the UPS status display: battery health indicator, estimated runtime, and load percentage. A UPS running above a high percentage of rated load won’t provide the runtime its label suggests
- Test UPS failover by unplugging it from the wall and confirming all connected devices stay online. Time how long the system runs; compare against your expected outage duration
- Inspect PoE switch port assignments and total draw. Each port has a wattage budget; exceeding it causes cameras to drop offline intermittently
- For cable runs, pure copper Cat6 is the standard for PoE reliability. Copper-clad aluminum (CCA) cable can cause PoE failures, particularly on long runs. The maximum reliable Ethernet distance without active switching is 328 feet; runs longer than this require active switching or repeaters.
- Test cellular backup by disabling the primary internet connection and confirming the panel or NVR switches to cellular within the expected failover window. Then confirm remote access works over the cellular path
- For VLAN configuration, placing security devices on a dedicated network segment reduces both attack surface and bandwidth contention with general traffic
Pro Tip: Label every PoE port on your switch with the camera it feeds. When a camera drops offline, you’ll spend 30 seconds tracing it instead of 30 minutes.
How do you run a repeatable system test with pass/fail criteria?
Ad hoc testing produces inconsistent results. A scripted test produces a record you can compare month over month.
- Place the system in test mode with your monitoring center before starting.
- Trigger the control panel alarm by opening a protected door. Expected result: alarm sounds within 30 seconds, monitoring center logs the event.
- Test camera motion detection by walking through each camera’s field of view. Expected result: motion event logged with a timestamp and thumbnail.
- Test access control open/close. Present a valid credential, confirm entry; present an invalid credential, confirm denial and alert.
- Trip and restore a sensor. Open a door contact, confirm zone trips; close it, confirm zone restores. Check the panel log for both events.
- Export a footage clip. Pull a 60-second clip from the NVR and confirm it plays back with correct timestamp and resolution.
- Remove the system from test mode and confirm the monitoring center is back on live watch.
| Test | Expected Result | Fail Action |
|---|---|---|
| Panel alarm trigger | Alert logged within 30 seconds | Check panel communication path; call monitoring center |
| Camera motion detection | Event logged with timestamp | Check recording mode; confirm motion sensitivity setting |
| Access control denial | Alert generated for invalid credential | Review reader firmware and credential database |
| Sensor trip and restore | Both events logged correctly | Inspect sensor alignment and battery; replace if needed |
| Footage export | Clip plays at correct resolution | Check drive health; run SMART test |
What operational habits keep a security system effective day to day?
The technology is only as reliable as the people operating it. Alert fatigue and operator error are among the most common causes of overlooked vulnerabilities during audits.
- Use one primary control layer. Choosing a single main app or hub reduces the chance that a household member or staff person doesn’t know how to arm, disarm, or respond to an alert. Multiple apps create gaps.
- Unique credentials for every user. Shared PINs and passwords make it impossible to audit who did what and when. Every person who accesses the system should have their own credential.
- Remove departed users the same day they leave. Not the next week. The day they leave.
- Tune notifications. Separate low-priority motion alerts (a squirrel on the back porch) from high-priority alerts (door forced open after hours). Most panels support alert tiers; use them.
- Schedule a tabletop drill quarterly. Walk staff or household members through the response steps for a break-in, a fire alarm, and a medical emergency. People who have rehearsed a response are faster and calmer when it’s real.
For property managers handling multiple sites, monitoring procedures and alert management at scale require a more structured approach than a single-home setup.
Pro Tip: Assign one person as the system owner for each property. That person owns the user list, the firmware update schedule, and the inspection log. Shared responsibility usually means no responsibility.
What should your inspection log include?
A log that’s missing key fields is nearly useless for insurance claims, compliance audits, or troubleshooting a recurring fault. Every inspection entry should capture:
| Field | Why It Matters |
|---|---|
| Date and time | Establishes inspection cadence for auditors and insurers |
| Inspector name | Creates accountability and a contact for follow-up questions |
| System / device serial numbers | Ties findings to specific hardware for warranty and replacement |
| Test results (pass/fail per item) | Documents system health over time; flags recurring failures |
| Firmware versions | Confirms patch status; required for compliance and cybersecurity reviews |
| Photos | Visual evidence of physical condition; useful for insurance and legal purposes |
| Remediation actions taken | Shows what was fixed, by whom, and when |
| Next scheduled inspection date | Keeps the cadence from slipping |
Retain inspection logs for an adequate period. For video evidence, maintain an appropriate retention window, but extend it indefinitely for any footage tied to an incident or insurance claim. A preventative maintenance template built around these fields keeps records audit-ready without extra effort.
What are the most common security system problems and how do you fix them?
Most faults have a short list of causes. Work through these before calling a technician.
- Camera offline. Check the PoE port indicator on the switch. If it’s dark, swap the camera to a known-good port. If the port is active but the camera is still offline, power-cycle the camera by unplugging and re-seating the cable. Check the cable for physical damage at the connector.
- Motion false positives. Lower the PIR sensitivity one step at a time. Check for heat sources (HVAC vents, direct sunlight on a wall) in the sensor’s field of view. If the sensor is outdoors, confirm it’s rated for exterior use.
- Control panel communication failure. Confirm the broadband connection is active. Check whether cellular backup has taken over. If both paths are down, the panel is isolated; call your monitoring center immediately.
- Short recording retention. The drive is filling faster than expected. Either reduce resolution on low-priority cameras, switch those cameras to motion-triggered recording, or add storage.
- Battery drain on wireless sensors. A sensor that’s eating batteries faster than expected is usually reporting too frequently due to a loose contact or a misaligned magnet. Reseat the magnet and check the gap distance against the manufacturer’s spec.
When a quick fix involves exposed mains wiring, a failed backup battery that won’t hold a charge, or evidence of physical tampering, stop and call a licensed technician. Those are not DIY situations.
When should you hire a professional, and what will they actually do?
Some conditions are clear escalation triggers. Don’t wait on these:
- Exposed or damaged low-voltage wiring that you didn’t install and can’t trace
- Repeated false alarms that persist after sensitivity tuning
- A backup battery that fails load testing or won’t charge
- Physical signs of tampering: scratched housings, moved cameras, cut cables
- An end-of-life panel with no available firmware updates or replacement parts
- Any rewiring that crosses into the electrical panel or requires conduit work
A qualified technician will arrive with a full inventory checklist, run SMART analysis on every drive, verify PoE loads and cable integrity, audit firmware and credentials across all devices, and confirm NFPA and UL alignment where applicable. The deliverable should be a signed inspection report with photos, a prioritized remediation list with cost estimates, and warranty notes on any parts replaced. If a technician can’t produce a written report, find one who can.
Key Takeaways
A complete security system inspection covers nine subsystems on a daily-to-annual schedule, with monthly full checks and an annual professional review as the non-negotiable anchors.
| Point | Details |
|---|---|
| Start with power and the panel | Check backup battery and AC power first; a dead battery makes every other check unreliable. |
| Cameras need physical and optical checks | Walk to each unit, clean the lens, confirm the mount, and verify night mode at the right time of day. |
| Audit user accounts quarterly | Remove stale credentials the same day a person leaves; limit super-admin roles to two people. |
| Use pure copper Cat6 for PoE runs | Avoid CCA cable on long runs; Ethernet distance without active switching should be kept within reliable limits. |
| Lowvoltagecorp handles inspection and repair | For escalated issues, wiring work, or annual professional reviews, Lowvoltagecorp provides inspection, maintenance, and camera repair services. |
What installers actually see in the field
The gap between a checklist on paper and a system that works under pressure usually comes down to a handful of recurring mistakes. Default credentials left unchanged on cameras and NVRs show up on nearly every audit. Wire routing that cuts corners, literally, produces cable jacket damage that only shows up months later as an intermittent fault. And CCA cable on long PoE runs is the silent killer of 4K camera reliability.
The practical dos: document every serial number at installation, not after the fact. Test cameras at night and in direct afternoon sun, not just at 10 AM on a clear day. Use pure copper Cat6 for reliable PoE—avoid CCA cable, and keep any run under 328 feet unless using active switching or repeaters.
The don’ts: don’t disable smoke or CO detectors for any reason without notifying your monitoring center and following the local fire code protocol. Don’t run three different security apps on the same property without training every person who uses them. Fragmented control is how a real alarm gets missed because someone thought someone else was watching.
Security audits done right are not paperwork exercises. They’re the moment you find out whether the system you think you have is the system you actually have.
Lowvoltagecorp can handle your inspection, maintenance, and repairs
Skip the guesswork on your next inspection. Lowvoltagecorp specializes in security camera installation, repair, and maintenance for homeowners and property managers across the US, and the difference between a self-inspection and a professional one is a signed report with photos, a prioritized remediation plan, and someone who’s traced a thousand cable faults before yours.

Services include full system inspections, camera and wiring repairs, PoE network checks, and firmware and credential audits. If your cameras need rewiring or your camera wiring needs a full review, that’s a straightforward service call. For property managers dealing with camera faults at scale, the camera repair workflow covers diagnosis and remediation from a single unit to a full site.
Schedule your inspection or request a quote at lowvoltagecorp.com.
Authoritative sources and further reading
These sources back the technical claims in this article and are worth bookmarking for your own audit documentation.
- NIST SP 800-70 Rev. 4: National Checklist Program for IT Products — The federal standard for security configuration checklists, covering firmware, credentials, and network segregation. Reference this when building a compliance-ready inspection log.
- NFPA Smoke Alarm Resources — NFPA guidance on smoke alarm placement, testing intervals, and replacement schedules. Use this to align your fire/life-safety checks with the recognized standard.
- CPSC Carbon Monoxide Information Center — CPSC recommendations on CO alarm placement and maintenance. Required reading for any residential or commercial property inspection.
- IN.gov Home Security Checklist (Southport Police) — A law enforcement-sourced residential checklist covering doors, windows, lighting, and landscaping. Useful as a baseline for the physical security portion of any home assessment.
- NCPC Home Security Checklist (PDF) — The National Crime Prevention Council’s printable checklist for residential security. Good reference for the exterior and access control sections.
- Price Security Systems: Video Surveillance Installation Checklist — Practical field guidance on PoE cabling, recording modes, retention settings, and camera placement. Directly relevant to the camera and network sections of any inspection.
- SafeHome.org: Security System Maintenance Checklist — A consumer-focused maintenance schedule with testing intervals and battery replacement guidance.
- Lowvoltagecorp: Security System Installation Steps — Baseline installation and wiring guidance for readers who discover issues that require reinstallation or cable work during their inspection.