Wired network troubleshooting is the systematic process of diagnosing and resolving LAN connectivity failures by working through each layer of the OSI model from physical cabling up to application services. The OSI model layered approach resolves 80% of wired network problems within the first three layers, which means most issues you face never require deep application-level investigation. Tools like cable testers, ping, traceroute, and nslookup form the core diagnostic toolkit for any wired network repair guide worth following. This article walks you through every stage of the process, from physical inspection to DNS verification, so you can isolate faults fast and fix them with confidence.
What are the essential tools for wired network troubleshooting?
Before running a single command, you need the right equipment in hand and a clear picture of the network you are working on. Showing up to a troubleshooting job without documentation is like performing surgery without an X-ray. The tools below cover both physical diagnostics and software-based cable network diagnostics.
Physical tools every technician needs
- Cable tester: A basic continuity tester confirms wire order and detects opens or shorts. A certification tester measures insertion loss, crosstalk, and delay skew, which a basic tester cannot catch. Use certification-grade equipment when validating Cat6A or higher runs.
- Loopback plug: Confirms a switch port or NIC can send and receive traffic without a connected device in the loop.
- Crimp tool and spare RJ45 connectors: Field-terminated cables fail more often than factory-made patch leads. Carry both Cat5e and Cat6 connectors.
- Tone generator and probe: Traces cable runs inside walls or above ceiling tiles when labels are missing or wrong.
Software tools and their sequence
| Tool | Layer | Primary use |
|---|---|---|
| ipconfig / ifconfig | Network (L3) | Verify IP address, subnet, gateway, and DNS |
| ping | Network (L3) | Test reachability to gateway, DNS, and remote hosts |
| traceroute / tracert | Network (L3) | Map hop-by-hop path and identify where packets stop |
| nslookup | Application (L7) | Confirm DNS resolution for hostnames |
| netstat | Transport (L4) | Show active connections and listening ports |

Command-line tools used in a consistent sequence provide a clear diagnostic story. Start local, confirm the loopback, then move outward to the gateway and beyond.
Pro Tip: Before touching anything, pull the network diagram and verify the asset list. Clear problem scoping prevents chasing symptoms unrelated to root causes, and knowing whether the issue affects one device, one VLAN, or an entire site cuts your troubleshooting time significantly.
How to troubleshoot physical layer issues in wired networks
Physical layer problems account for the majority of wired network failures, and they are the easiest to overlook when you are eager to jump into switch configs. Start here every time, without exception.
Step-by-step physical inspection
- Check link lights. A solid green LED on both the NIC and the switch port confirms a physical connection. An amber or absent light means the link has not negotiated. Swap the patch cable first before touching anything else.
- Inspect the cable visually. Look for sharp bends, crushed sections near door frames, and damaged RJ45 boots. Network cabling degrades over time due to unseen stress, so a cable that passed testing six months ago may be failing today.
- Verify termination standard. Confirm both ends of a cable use the same wiring standard, either T568A or T568B. A crossover wired as a straight-through cable will not link on modern switches with Auto-MDIX, but older equipment will fail silently.
- Test with a known-good cable. Swap the suspect cable with one you have already verified. This single step eliminates the cable as a variable in under 60 seconds.
- Power cycle the devices. Power cycling for at least 30 seconds fully clears internal memory and resets port negotiation. This resolves a surprising number of link failures that look like hardware faults.
- Check distance. Cat5e and Cat6 copper runs are rated to 100 meters. Runs exceeding that limit produce intermittent errors and reduced throughput rather than a clean link failure, which makes them harder to diagnose.
Cable tester comparison
| Tester type | What it checks | Best use case |
|---|---|---|
| Basic continuity tester | Wire order, opens, shorts | Quick field verification of patch leads |
| Advanced cable tester | Continuity plus length and split pairs | Diagnosing in-wall horizontal runs |
| Certification tester | Insertion loss, crosstalk, delay skew, return loss | Validating structured cabling to Cat6A or Cat8 spec |
Pro Tip: When a long cable run is suspect, use the divide-and-conquer method. Test from the patch panel to the midpoint first, then from the midpoint to the wall plate. This cuts your search area in half with each test and pinpoints the fault segment without pulling the entire run.
What steps diagnose logical and configuration issues?
Once you have confirmed the physical layer is clean, move to the Data Link and Network layers. This is where VLAN misconfigurations, DHCP failures, and IP addressing errors live.
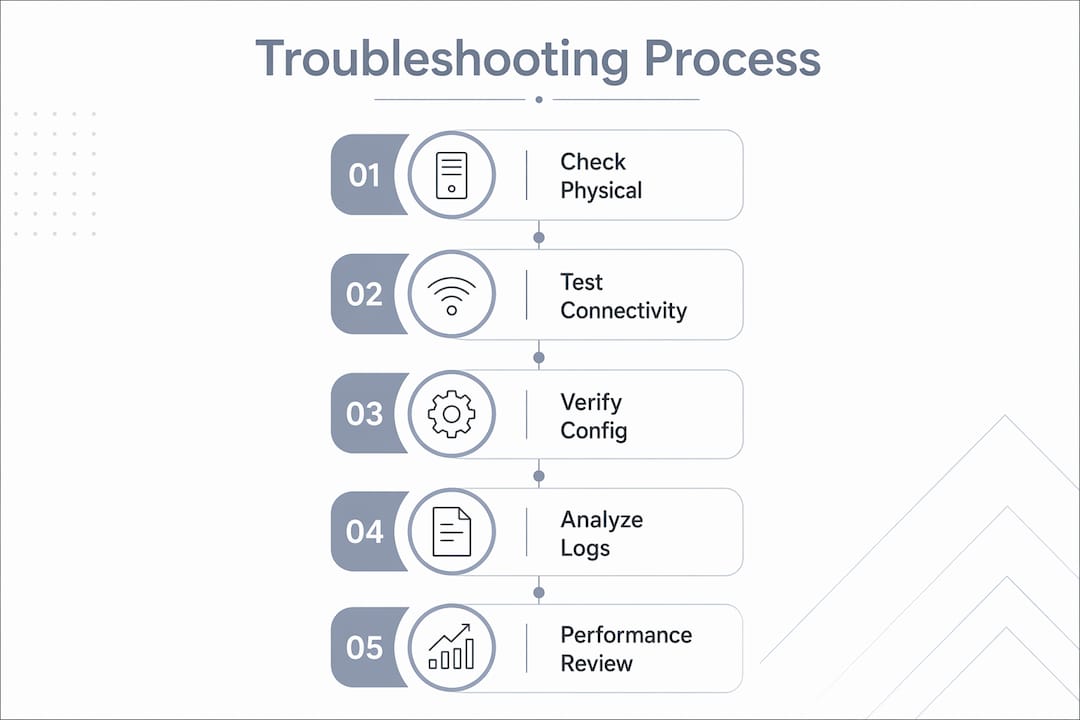
Start at the switch port. Log into your switch and check port status with "show interface` on Cisco IOS or the equivalent on Juniper Junos or HP ProCurve. Confirm the port is in the correct VLAN, that Spanning Tree Protocol has moved the port to a forwarding state, and that no error counters are incrementing. A port stuck in STP blocking state looks identical to a physical failure from the end device’s perspective.
Next, check the IP configuration on the affected device. An APIPA address of 169.254.x.x tells you the device failed to obtain a DHCP lease. That directs your investigation toward the DHCP server, the DHCP relay agent on the router, or a VLAN assignment mismatch on the switch port. It is not a NIC problem and it is not a cable problem.
Speed and duplex settings deserve attention on any link showing errors without a clean physical cause. Speed and duplex mismatches cause intermittent connectivity through auto-negotiation failures, producing packet loss and reduced link speeds that mimic a bad cable. Force both ends to the same speed and duplex setting to rule this out.
- Confirm IP address, subnet mask, default gateway, and DNS server with
ipconfig /allon Windows orip addron Linux. - Ping the loopback address (127.0.0.1) to confirm the TCP/IP stack is functional.
- Ping the default gateway to confirm Layer 3 reachability on the local segment.
- Ping a known external IP address such as 8.8.8.8 to confirm routing beyond the local network.
- Run
tracertortracerouteto identify the exact hop where packets stop forwarding.
Pro Tip: Always test against a known-good baseline before making configuration changes. Changing settings without a baseline reference turns a single fault into a cascading series of new variables that are far harder to untangle.
How to verify higher-layer issues affecting network performance?
When physical and configuration checks come back clean but users still report problems, the fault lives at Layer 4 through Layer 7. These issues are less common but take longer to diagnose without a structured approach.
DNS is the first place to look when users can reach IP addresses but not hostnames. Run nslookup hostname against both the configured DNS server and a public resolver like 8.8.8.8. If the public resolver resolves the name but the internal server does not, the problem is in your DNS infrastructure, not the network path.
Firewall rules and port filtering are the second most common cause of application-layer failures that look like network connection issues. Use telnet hostname port or curl to test whether a specific TCP port is reachable. A TCP connection that times out points to a firewall drop rule. A connection that resets immediately points to the service being down or refusing connections.
- Check Windows Event Viewer or Linux syslog for NIC errors, driver failures, and DHCP lease events.
- Review switch interface error counters for CRC errors, input errors, and output drops. These counters increment silently and only appear when you look for them.
- Test intermittent issues by running a continuous ping with
ping -ton Windows orping -i 1on Linux while physically moving the cable. Movement-induced packet loss confirms a marginal physical connection. - Use
netstat -anto confirm whether the application is listening on the expected port before blaming the network.
Pro Tip: When reviewing logs, correlate timestamps across the switch, firewall, and end device. A firewall log showing a deny event at the same second a user reports a failure is far more useful than any single tool run in isolation.
Key takeaways
Effective wired network troubleshooting requires a disciplined OSI model sequence, the right physical and software tools, and documented baselines that let you distinguish a new fault from a pre-existing condition.
| Point | Details |
|---|---|
| Start at Layer 1 every time | Physical inspection and cable testing resolve the majority of LAN failures before any config work is needed. |
| APIPA addresses signal DHCP failure | A 169.254.x.x address directs you to DHCP server health or VLAN misconfiguration, not the end device. |
| Baseline before you change anything | Testing against a known-good baseline prevents configuration changes from creating new, harder-to-isolate faults. |
| Certification testers outperform basic ones | Basic continuity testers miss crosstalk and insertion loss faults that fail Cat6A runs at speed. |
| DNS and firewall rules hide as network faults | Use nslookup and telnet to separate application-layer failures from genuine network connection issues. |
What I have learned after years of wired network work
The single most common mistake I see IT teams make is skipping the physical layer because it feels too simple. A senior engineer will spend 45 minutes in switch configs before someone finally swaps the patch cable and the link comes up. The OSI model exists precisely to prevent that. Follow it in order, every time, regardless of how obvious the cause seems.
The second pattern I see constantly is troubleshooting without documentation. You fix something, the issue comes back three weeks later, and nobody remembers what was changed. Documenting every step and configuration change is not bureaucratic overhead. It is the difference between a 10-minute fix and a two-hour investigation the second time around.
My strongest recommendation is to build and maintain baseline configs for every switch, router, and firewall in your environment. When something breaks, you compare the current state against the baseline and the delta tells you exactly where to look. That single practice has cut my average resolution time in half on complex multi-VLAN environments.
Finally, invest in a certification-grade cable tester if you manage structured cabling. The price difference between a basic tester and a Fluke Networks DSX CableAnalyzer is real, but so is the difference between catching a marginal Cat6A run before it causes intermittent failures versus chasing ghost problems for weeks.
— Aaron
Professional wired network support from Lowvoltagecorp
Persistent network connection issues in commercial properties and managed facilities often trace back to aging infrastructure, improper terminations, or configurations that were never documented in the first place. Lowvoltagecorp specializes in wired and wireless network installation, repair, and maintenance across South Florida, giving IT teams and property managers a single point of contact for structured cabling, switch configuration, and ongoing network upkeep.

Whether you need a full wired network assessment for a managed property or targeted repair work on a failing LAN segment, Lowvoltagecorp brings the tools, documentation practices, and field experience to resolve issues correctly the first time. Explore the network maintenance checklist to see how preventive service reduces emergency troubleshooting calls.
FAQ
What is the first step in wired network troubleshooting?
The first step is always a physical layer check. Verify link lights, inspect the cable for damage, and swap the patch lead with a known-good cable before touching any configuration.
How do I know if my DHCP server is causing the problem?
An APIPA address (169.254.x.x) on the affected device confirms it failed to receive a DHCP lease. Check DHCP server availability, relay agent configuration, and the switch port’s VLAN assignment.
What causes intermittent wired connection drops?
Intermittent LAN connectivity most often comes from duplex mismatches, marginal cable terminations, or runs exceeding the 100-meter limit for copper Ethernet. A certification tester and a forced speed/duplex setting on both ends will isolate the cause.
When should I use traceroute during troubleshooting?
Run traceroute after confirming local gateway reachability via ping. It maps the hop-by-hop path to a destination and identifies the exact point where forwarding stops, which is critical for diagnosing routing and WAN-edge issues.
Does a basic cable tester confirm a cable will work at full speed?
No. A basic continuity tester only verifies wire order and detects opens or shorts. It does not measure insertion loss, crosstalk, or delay skew, so a cable can pass a basic test and still fail to support Gigabit or 10-Gigabit Ethernet reliably.