Unreliable internet in a multifamily or commercial property is not a minor annoyance. It costs you time, money, and tenants. When residents lose connectivity during remote work hours or your access control system drops offline at 2 a.m., you feel it immediately. The damage from poor network wiring compounds fast: service calls pile up, complaints spike, and your reputation takes a hit that takes months to repair. A structured, step-by-step approach to network wiring removes that chaos from the equation. This guide walks South Florida property managers through exactly what to plan, install, test, and document for a rock-solid, future-ready network.
Table of Contents
- Essential tools, materials, and planning considerations
- Step-by-step network wiring process
- Common challenges and how to avoid them
- What to expect: testing, documentation, and long-term ROI
- Why documentation and rack organization matter more than you think
- Get expert help with your next network wiring project
- Frequently asked questions
Key Takeaways
| Point | Details |
|---|---|
| Plan for local needs | South Florida wiring must account for humidity, density, and building specifics to work reliably. |
| Follow clear steps | A systematic approach—from site survey to final documentation—prevents future problems and downtime. |
| Prioritize documentation | Well-organized labeling and records make troubleshooting and upgrades faster and cheaper. |
| Test before using | Always test and certify every cable and port before declaring installation complete. |
Essential tools, materials, and planning considerations
After understanding why reliable network wiring is critical, it’s essential to know what materials and plans set your project up for success, especially in South Florida’s challenging environment.
What you’ll need on site
Getting the materials right before a single cable is pulled saves you from costly mid-project delays. Here is a quick reference table covering the core tools and materials most network wiring projects require:
| Item | Purpose | Notes |
|---|---|---|
| Cat6 or Cat6A cable | Data transmission backbone | Cat6A recommended for future-proofing |
| Patch panel (24 or 48 port) | Central termination point | Label all ports during install |
| Network switch | Device connectivity | Match port count to current plus 20% future capacity |
| Cable tester / certifier | Verify continuity and speed | Required before sign-off |
| Keystone jacks and faceplates | Wall termination points | Choose low-profile for clean appearance |
| Cable management trays | Organize runs in rack | Prevents airflow issues and tangling |
| Label maker | Identify every drop and port | Non-negotiable for long-term ease |
| Fish tape and drill bits | Route cable through walls | Core drill bits for concrete buildings |
| RJ45 crimp tool | Terminate patch cables | Buy quality; cheap tools cause failures |
Pre-project planning questions
Before you order anything or schedule a crew, work through these questions with your team or vendor:
- Where are the primary network demand zones? Think lobbies, fitness centers, unit corridors, and management offices.
- How many devices are expected per unit or per zone, now and two years from now?
- Does your building have concrete block construction or wood framing? This dramatically affects cable routing time and cost.
- Are there existing conduits, or will new pathways need to be created?
- What smart property tech is planned: keycard access, IP cameras, smart thermostats, or motorized gates?
- Who responds if something goes offline at midnight on a holiday weekend?
That last question matters more than most property managers realize. South Florida connectivity deployments require engineering beyond generic templates, and property managers should expect region-specific design factors like site surveys, equipment fit for the environment, user density, and clear support and response commitments from vendors.
South Florida-specific planning factors
South Florida is not like installing a network in a suburban office park in Ohio. High ambient humidity accelerates corrosion on connectors and patch panels, especially in outdoor mechanical rooms or rooftop equipment enclosures. Dense high-rise construction often uses poured concrete, which blocks wireless signal and makes cable routing labor-intensive and expensive. Seasonal population swings in communities like Boca Raton, Doral, or Aventura mean device density can double during winter months.
Plan for peak load, not average load. If your building fills to 90% occupancy from November through April, design the network for that number, not your summer average. Otherwise you will get flooded with complaints exactly when your high-value tenants are on property.
Pro Tip: Engage your vendor or installation partner at the planning stage, not after you’ve already purchased materials. Discuss support response times, emergency escalation procedures, and warranty coverage before any contract is signed. A vendor who takes three days to respond to a critical outage is not the right partner for a South Florida property.
Step-by-step network wiring process
With the right plan and materials in hand, let’s break down how to execute your project, step by step from initial survey to final records.
A structured cable installation method follows a clear sequence: site survey and cabling design first, then installation, followed by testing and certification, and finally documentation. Here is what each step looks like in practice for a property manager overseeing the work:
-
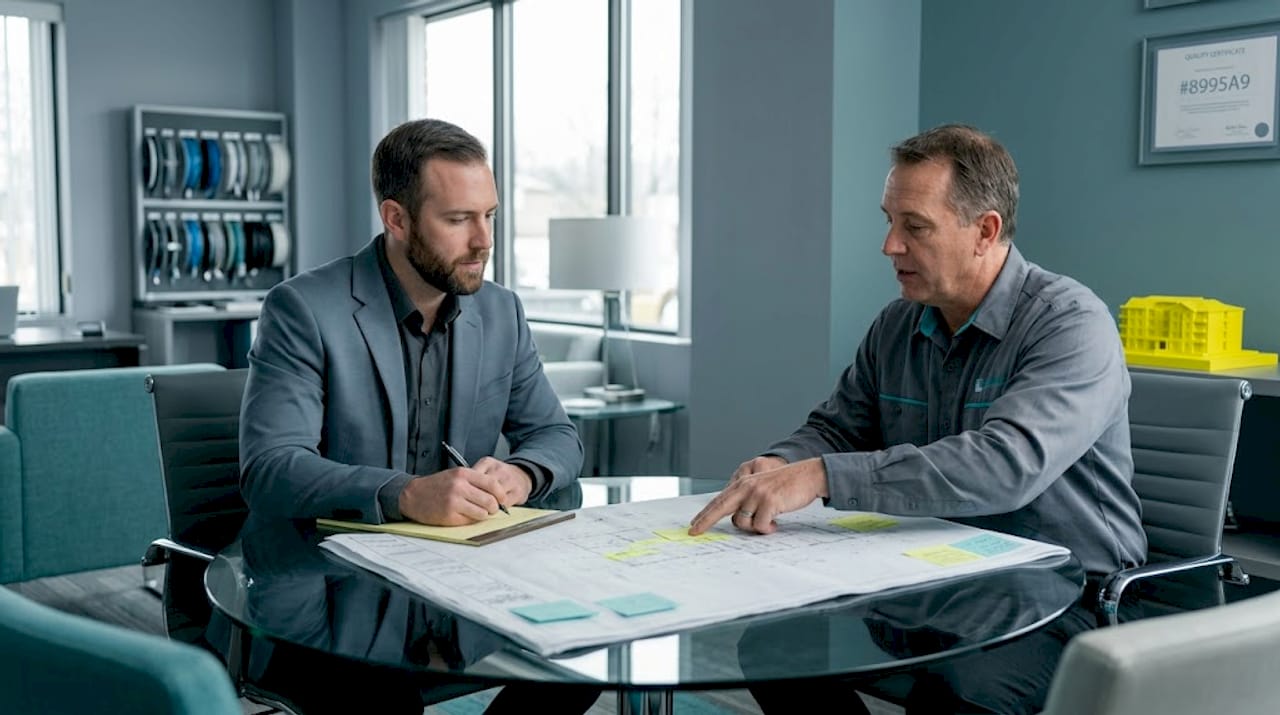
Site survey. Walk the entire property with your installer. Identify the main distribution frame location, secondary telecom rooms, and every endpoint that needs a data drop. Note obstacles like fire doors, elevator shafts, and mechanical rooms. This is also when you confirm conduit availability and flag any code concerns. Your job as property manager: get access to every space and make decisions on the spot so the crew doesn’t lose time.
-
Cabling design. The installer draws a network diagram showing cable routes, rack layout, switch placement, and port assignments. This design document becomes your bible for the rest of the project. Review it carefully. Confirm that every smart device, camera location, and access point is accounted for. If you plan to add motorized gate controls or cell boosters later, say so now so conduit is placed accordingly.
-
Installation. Cable runs are pulled, terminated at both ends, and secured with proper management. In South Florida concrete buildings, this often involves core drilling and conduit stub-outs. Every drop gets labeled at the wall plate and at the patch panel simultaneously. No exceptions. Skipping labels during install is how properties end up paying twice for work that should have been simple.
-
Testing and certification. Every cable run is tested with a certifier, not just a basic tester. Certification documents that each run meets the rated spec for Cat6 or Cat6A, including length, attenuation, and crosstalk. Demand a printed or digital report for every single run. This is your proof that the work meets industry standards and your protection if disputes arise later.
-
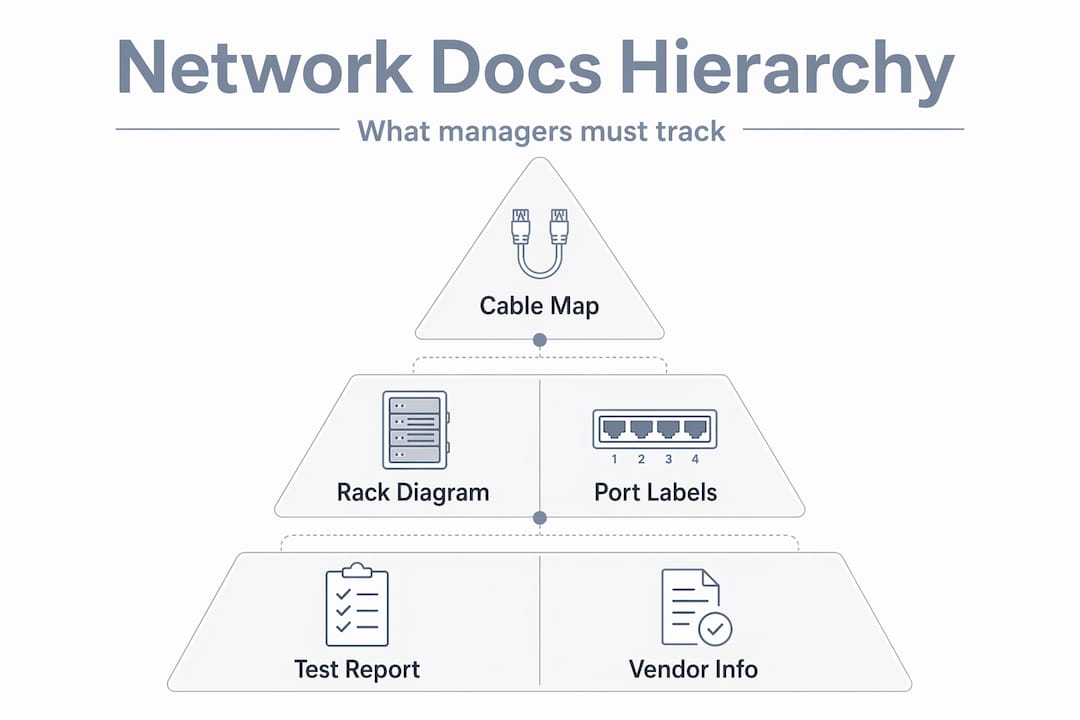
Documentation. The final step ties everything together. Port maps, VLAN assignments, IP address lists, rack diagrams, and labeled photos all go into a binder and a digital folder. A documented, rack-centered cabling workflow improves maintainability: mount patch panel and switches logically, group and label patch cables, and document port mappings, VLANs, and device assignments.
“A well-labeled, fully documented network is the difference between a 20-minute fix and a two-day troubleshooting nightmare. The documentation is not optional; it is the deliverable.”
Standard install vs. documented workflow: a quick comparison
| Factor | Basic cable install | Documented rack-centered workflow |
|---|---|---|
| Troubleshooting time | Hours to days | Minutes to hours |
| Tech upgrade speed | Slow: requires re-tracing | Fast: follow the map |
| Vendor handoff ease | Difficult | Seamless |
| Compliance readiness | Low | High |
| Long-term cost | Higher (repeat service calls) | Lower |
Pro Tip: Ask your vendor to build a digital network map on day one of installation, not after project completion. Tools like network diagramming software let you update the map as devices change, saving hours every time you bring in a new tech vendor or upgrade equipment.
Common challenges and how to avoid them
Even the best plans go awry without attention to detail. Let’s look at typical mistakes and how you can proactively avoid them in your wiring project.
The pitfalls that cost property managers the most
- Skipping rack layout planning. When patch panels and switches are installed without a logical layout, tracing a single cable becomes a 45-minute exercise. Plan rack layout on paper before anything is mounted.
- Ignoring documentation. Most delayed and expensive repairs trace back to missing or inaccurate documentation. The tech who installed your system two years ago is gone, and nobody knows which port connects to which unit.
- Underestimating user and device density. With smart TVs, tablets, phones, laptops, and smart home devices, a single unit can easily have 10 to 15 connected devices. Multiply that across 200 units and your switch count and access point placement need to reflect real-world load.
- Poor cable management. Bundled cables without management trays block airflow in racks and cause equipment to overheat. In South Florida, where ambient temperatures in mechanical rooms can reach the upper 80s, overheating is a genuine and recurring risk.
- Failing to plan for future tech. If you don’t pull conduit for future access control wiring or camera runs now, you’ll pay to core drill again in 18 months. Leave pull strings and spare conduit runs during the initial project.
Region-specific mistakes in South Florida
South Florida connectivity deployments require engineering beyond generic templates, and those templates fail most often because they ignore local building materials and climate. Outdoor enclosures need weatherproof ratings appropriate for coastal humidity and salt air. Connectors in unconditioned spaces should be gold-plated or rated for high humidity to resist oxidation. Seasonal spikes in occupancy require scalable switch infrastructure, not a system maxed out from day one.
The operational success of tech integration also depends heavily on rack and cabinet organization, including port, VLAN, and device mapping. Without that organization, troubleshooting and upgrades become expensive and slow, every single time.
Pro Tip: Label every drop and every port during installation, on the same day the cable is terminated. Use a consistent labeling convention like building initial, floor number, and drop number, for example MB-03-14 for Main Building, Floor 3, Drop 14. Consistency makes future repairs straightforward for any tech you bring in.
What to expect: testing, documentation, and long-term ROI
Completing the wiring is only part of the equation. The final, crucial steps involve testing and keeping organized network records for continuous benefit.
What to require from your vendor after installation
- Printed or digital certification reports for every cable run
- Proof that each run meets Cat6 or Cat6A spec, including length limits under 295 feet for structured cabling
- A completed port map showing which physical port connects to which location
- VLAN assignment documentation if your network segments traffic by zone or function
- As-built rack diagrams reflecting how the final install looks, not just how it was designed
Following the testing and documentation sequence after physical installation is what separates a professional job from one that will cause problems within six months.
Documentation checklist for property managers
| Document | What it includes | Why it matters |
|---|---|---|
| Cable run map | Route of every run, labeled by ID | Speeds up repairs and future installs |
| Port assignment chart | Which port connects to which drop | Eliminates guesswork during troubleshooting |
| VLAN and IP map | Logical network segmentation | Required for security camera and access control integration |
| Rack diagram | Physical layout of all equipment | Guides any tech working in the rack |
| Certification reports | Per-run test results | Proof of standards compliance |
| Vendor contacts and SLAs | Emergency escalation path | Critical for fast response during outages |
Good documentation pays dividends immediately. When a tenant calls at 8 a.m. because their unit has no internet, your tech can pull up the port map, find the drop, and resolve the issue without tracing cables manually through a stuffed rack. That efficiency is measurable in labor cost, tenant satisfaction, and your own sanity.
A well-maintained, documented cabling workflow also makes vendor transitions easier. If you change providers or bring in a new integrator for camera systems, they can onboard quickly because the records are complete.
Pro Tip: Keep both a cloud-based digital copy and a laminated hard copy of your rack diagram and port map inside the telecom room itself. When a tech is standing in front of the rack at midnight during an outage, the last thing they should have to do is search their email for a diagram.
Why documentation and rack organization matter more than you think
Most articles about network wiring spend 80% of their focus on the physical cable pull and about two sentences on documentation. That is exactly backward from how most property managers experience the long-term value of a good install.
The cable in the wall does not change after day one. The problems come later, when a tenant moves out and someone needs to reprovide that port, when you add IP cameras to three new hallways, when a switch fails and the replacement tech has never seen your rack before. In every one of those situations, your documentation is the difference between a quick fix and a painful, expensive ordeal.
We have seen properties where the original installer did excellent physical work but handed over zero documentation. Two years later, a firmware update knocked several access points offline. Nobody knew which switch ports they were connected to. It took a full day of tracing to restore service, at a rate that far exceeded what proper documentation would have cost.
The operational success of tech integration in properties depends on rack and cabinet organization alongside documentation. Port maps, VLAN records, and device assignments are not paperwork formalities. They are the operating manual for your building’s technology infrastructure.
Investing an extra four hours during installation to create complete records pays back within the first service call. The math is simple. A technician who knows where to look takes 30 minutes. One who is guessing takes four hours. Multiply that by every future call over a five-year period and the value of good documentation becomes obvious.
Get expert help with your next network wiring project
Ready to get started or need expert support to ensure your wiring project succeeds? Here’s where to turn for reliable help.
Even well-prepared property managers get better outcomes by partnering with local professionals who know South Florida’s building types, climate challenges, and tech integration requirements. Attempting to manage a complex wiring project without experienced hands on the ground leads to the exact problems this guide warns against.

At Low Voltage Corp, we specialize in wired and wireless network installation, security camera systems, motorized gates, and cell booster setups, all designed for the demands of South Florida properties. From the initial site survey through final documentation and ongoing support, our team handles every step with the detail and accountability property managers need. Visit Low Voltage Corp services to schedule a consultation and get your wiring project done right the first time.
Frequently asked questions
What are the key steps in network wiring?
The main steps are site survey, cabling design, installation, testing and certification, and thorough documentation, following the structured installation sequence that professional installers use on commercial projects.
Why is documentation so important for network wiring projects?
Complete documentation helps with troubleshooting, quick repairs, and future upgrades, reducing long-term costs significantly. A rack-centered documented workflow that includes port mappings, VLANs, and device assignments makes every future service call faster and cheaper.
What South Florida-specific factors should I consider in network wiring?
Account for user density, concrete building materials, and high humidity, and ask your provider about emergency response commitments. South Florida deployments require region-specific engineering, not off-the-shelf designs.
What testing should be performed after installation?
Each cable run should be tested and certified using a cable certifier that confirms the run meets Cat6 or Cat6A specifications. This follows the testing and certification step of the standard professional installation sequence and gives you documented proof of performance.