Most South Florida property owners don’t realize their security camera went offline because of a corroded wire splice buried in a junction box, not because the camera itself failed. That’s the hidden reality of low-voltage troubleshooting in a hot, humid, coastal climate. Replacing expensive equipment when the real problem is a $2 connector is a mistake we see constantly. This guide walks you through the exact steps to diagnose and fix the most common low-voltage failures affecting security cameras, motorized gates, wired networks, and cell boosters across South Florida properties.
Table of Contents
- Understand your low-voltage system basics
- Identify and diagnose voltage drop issues
- Combat corrosion and moisture failures in South Florida
- Solve intermittent failures and instability
- Why environmental factors matter more than equipment in South Florida
- Get professional help for your low voltage system
- Frequently asked questions
Key Takeaways
| Point | Details |
|---|---|
| Check voltage directly | Always measure voltage at both the transformer and end-device to pinpoint drop-related problems. |
| Inspect for corrosion | Corroded connections are common in South Florida and should be routinely checked and rebuilt. |
| Prevent moisture failures | Protect outdoor connectors with waterproofing materials to extend system lifespan. |
| Test under real load | Verify wiring repairs by running devices as they would operate—idle checks often miss true faults. |
| Seek expert help | Some low voltage issues are complex and best handled by specialists for faster, lasting results. |
Understand your low-voltage system basics
Before you start pulling wires or swapping devices, you need to know what you’re actually working with. Low-voltage systems operate at 12V or 24V DC (direct current), which is far below the 120V or 240V used in standard household circuits. That lower voltage is intentional. It makes these systems safer to handle, compatible with sensitive electronics, and easier to run through walls and conduit without the same code restrictions as high-voltage wiring.
Your property likely has several low-voltage systems running at once. Low voltage systems overview covers the full picture, but the most common ones include security cameras, motorized gate operators, access control readers, wireless network access points, and cell signal boosters. Each of these relies on clean, consistent power delivery to function properly.
Here’s what typically triggers a troubleshooting call:
- Security cameras showing a blurry, flickering, or black image
- A motorized gate that hesitates, reverses unexpectedly, or won’t open at all
- Network access points dropping connection intermittently
- Cell boosters that seem to work sometimes but not others
- Outdoor lighting fixtures that are noticeably dim compared to when they were installed
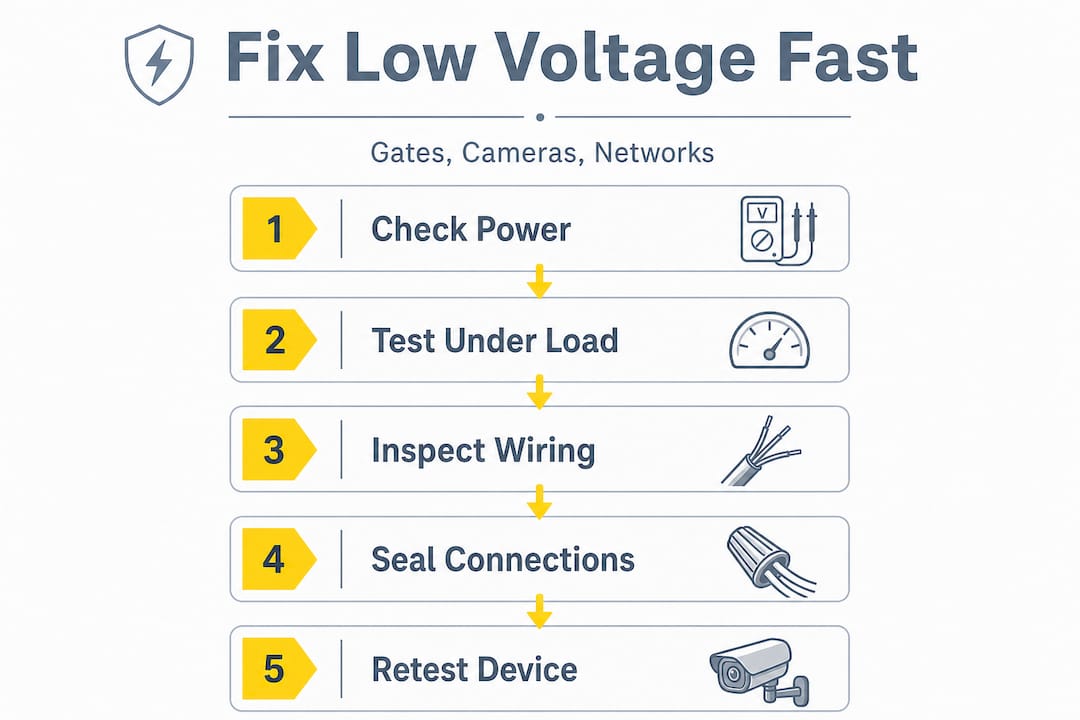
Most of these systems are powered by either a dedicated power supply unit or a transformer. Diagnosing issues with 12V low-voltage systems typically used in residential properties follows a consistent pattern: start at the source, work toward the device. That approach saves time and prevents the common mistake of blaming the device when the wiring is actually at fault.
Understanding common wiring red flags before you start also helps you know what to look for visually before you even pick up a multimeter.
Identify and diagnose voltage drop issues
Voltage drop is the single most common cause of underperforming low-voltage devices. It happens when the voltage at the device end of a wire run is measurably lower than the voltage at the power source. The longer the wire run, the smaller the wire gauge, or the more devices daisy-chained together, the worse the drop gets.
Here’s how to test for voltage drop step by step:
- Set your multimeter to DC voltage mode.
- Measure voltage directly at the transformer or power supply output terminals. Write it down.
- Measure voltage at the first device on the circuit (closest to the power source). Write it down.
- Measure voltage at the last device on the circuit (furthest from the source). Write it down.
- Compare all three readings. A drop of more than 10% from source to end device is a problem.
A voltage drop pattern can be diagnosed by measuring voltage at the transformer and at both near and far fixtures. A noticeable drop at the far end indicates undersized wire, long daisy-chains, or too many fixtures on a single run. That same principle applies directly to your gate operator, camera system, or network switch.
Symptom vs. likely cause table:
| Symptom | Most likely voltage drop cause |
|---|---|
| Camera image is dim or washed out | Long wire run with undersized gauge |
| Gate motor hesitates or reverses | Voltage dipping below minimum operating threshold |
| Network access point drops signal | Power over Ethernet (PoE) voltage insufficient |
| Cell booster loses gain intermittently | Unstable supply voltage from overloaded circuit |
| Outdoor lights noticeably dimmer at end of run | Too many fixtures daisy-chained on one circuit |
Pro Tip: Always test voltage with the devices actually running, not just powered on and idle. A gate motor draws significantly more current when it’s moving than when it’s sitting still. That load is what reveals the real-world voltage drop you need to fix.
Fixing voltage drop usually means upgrading to a larger wire gauge, splitting the circuit into two shorter runs, or moving the transformer closer to the devices. Diagnosing outdoor lighting issues follows the same logic as diagnosing a camera or gate circuit. The physics don’t change. Also review aluminum wiring troubleshooting if your property has older wiring, since aluminum conductors behave differently than copper and can make voltage drop worse.
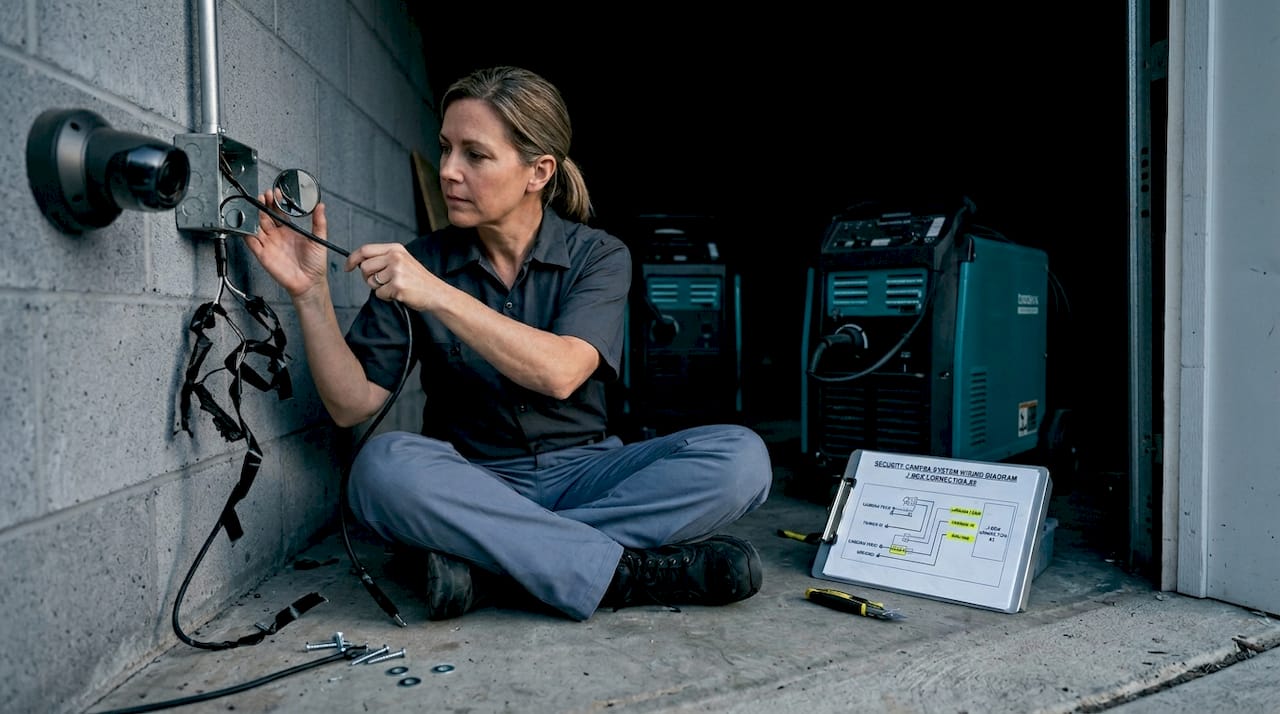
Combat corrosion and moisture failures in South Florida
South Florida is not a forgiving environment for electrical connections. The combination of high humidity, salt air from the coast, and intense heat creates conditions that accelerate corrosion faster than almost anywhere else in the country. A connection that would last 20 years in a dry climate might fail in two or three years here if it isn’t properly sealed.
In South Florida’s hot, humid, coastal conditions, troubleshooting should always include corrosion and moisture-related failure modes. Outdoor low-voltage wiring and connectors can develop corroded connections that increase resistance and cause intermittent failures, dim outputs, or instability. That resistance increase is the key problem. Even a small amount of corrosion at a splice point can add enough resistance to drop voltage significantly at the device end.
Corroded connections don’t just reduce current flow. They increase resistance unevenly, which means your device may work fine in the morning and fail by afternoon as the metal expands in the heat and the corroded contact point shifts.
Visual signs of corrosion to look for:
- Green or white powdery residue on wire ends or connector terminals
- Brittle or cracked insulation around outdoor wire splices
- Discoloration or pitting on metal connector pins
- Moisture inside junction boxes or camera housings
- Wire ends that look dark gray or black instead of shiny copper
Steps to clean and rebuild corroded connections:
- Cut back the wire past the corroded section to expose clean copper
- Use fine sandpaper or a wire brush to clean any metal terminals
- Apply electrical contact cleaner spray to remove oxidation residue
- Reconnect using weatherproof wire nuts or crimp connectors rated for outdoor use
- Seal every outdoor splice with waterproof silicone gel or heat-shrink tubing with adhesive lining
- Zip-tie wires so they don’t pool water at connection points
Moisture failure modes and recommended fixes:
| Failure mode | Recommended fix |
|---|---|
| Corroded wire splice in junction box | Cut back wire, resplice with weatherproof connector, seal box |
| Corroded camera power connector | Replace connector, use waterproof plug cover |
| Moisture inside gate operator housing | Reseal housing gaskets, check conduit entry points for gaps |
| Oxidized terminal block in network enclosure | Clean terminals, apply anti-oxidant compound |
| Cracked wire insulation near ground level | Replace wire section, use UV-resistant outdoor rated cable |
Pro Tip: Don’t just clean corroded connections and call it done. Seal every outdoor connector with waterproof gel or heat-shrink tubing with a built-in adhesive lining. That extra step is what separates a fix that lasts one season from one that lasts five years.
For additional guidance on corrosion troubleshooting tips specific to low-voltage systems, and for reference on preventing connector failures in outdoor environments, both resources are worth reviewing before you start work.
Solve intermittent failures and instability
Intermittent failures are the most frustrating category of low-voltage problems. Your camera works fine for three days, then goes black for an hour. Your gate opens reliably every morning but randomly refuses to respond on Tuesday afternoons. These random patterns make people assume the device is defective. Usually, it isn’t.
Corroded connections that increase resistance cause intermittent failures, dim outputs, and instability in outdoor low-voltage wiring. The key word is intermittent. Corrosion and loose connections behave inconsistently because they’re affected by temperature, vibration, and moisture levels that change throughout the day.
Most frequent causes of intermittent failures and matching solutions:
- Loose wire at terminal block: Tighten and apply thread-locking compound to terminal screws
- Corroded splice that makes partial contact: Cut back and resplice with weatherproof connector
- Undersized wire causing voltage drop under load: Upgrade wire gauge or shorten the run
- Overloaded transformer or power supply: Add a second power supply or redistribute devices
- Water intrusion into junction box: Reseal box, redirect conduit entry to prevent water pooling
- Damaged cable from UV exposure or physical stress: Replace full cable run with outdoor-rated wire
- Failing PoE injector or switch port: Test with known-good injector, replace if confirmed faulty
The stepwise approach to intermittent troubleshooting works like this. Start at the connections, not the device. Check every splice, terminal, and connector on the circuit before you assume the camera, gate board, or booster is bad. Then test for voltage under load. Then check for corrosion. Only after all of those check out should you consider replacing the device itself.
Reviewing common wiring faults gives you a broader checklist of what to look for during this process. And for guidance on fixing instability in low voltage systems, we cover specific scenarios for cameras, gates, and network equipment.
Pro Tip: After you reconnect any wires or terminals, always retest the device under actual operating load, not just idle power. A gate motor sitting still draws almost no current. Cycle it through a full open-and-close sequence and measure voltage at the motor terminals while it’s moving. That’s the only test that tells you whether your fix actually held.
Why environmental factors matter more than equipment in South Florida
Here’s a perspective that most generic troubleshooting guides won’t give you: the equipment is almost never the real problem on South Florida properties. We’ve seen property managers spend thousands replacing security cameras, gate boards, and network switches, only to have the exact same failures show up six months later. Why? Because nobody fixed the wiring.
South Florida’s climate is genuinely hostile to low-voltage infrastructure in a way that most people underestimate. Humidity doesn’t just cause surface rust. It works its way into connector housings, under wire insulation, and into terminal blocks over months and years. Salt air from the coast accelerates that process dramatically, especially within a mile or two of the water. The result is that wiring and connections on coastal properties age at roughly twice the rate of inland installations.
The uncomfortable truth is that “fixing the wiring” isn’t a one-time job in this climate. It’s an ongoing maintenance task. Property owners who treat their low-voltage infrastructure like a set-it-and-forget-it system will spend far more money replacing equipment over time than those who schedule annual inspections and proactive connector maintenance.
Contrarian wisdom: true troubleshooting always starts with connections, not devices. Before you order a replacement camera or call for a new gate board, spend 20 minutes checking every outdoor connection on that circuit. The odds are strong that you’ll find your answer before you spend a dollar on new equipment. Expert advice for coastal property owners consistently points to this same conclusion. Prevention and routine maintenance in South Florida’s environment is not optional. It’s the only strategy that actually works long term.
Get professional help for your low voltage system
If you’ve worked through the steps above and still can’t pin down the problem, that’s not a failure on your part. Some issues require specialized tools, like thermal imaging cameras to spot hot spots in wiring, or cable testers that can identify exactly where a break or fault occurs in a long underground run.
South Florida low voltage experts at Low Voltage Corp handle the full range of troubleshooting and repair work for security cameras, motorized gates, wired and wireless networks, and cell signal boosters. Whether you’re dealing with a single camera that keeps going offline or a gate system that’s been unreliable for months, the team brings the right tools and local climate knowledge to diagnose the actual root cause, not just swap parts until something works. Reach out for a site assessment and get a clear picture of what your system actually needs.
Frequently asked questions
How can I tell if voltage drop is causing dim lights or device failures?
Measure voltage at the transformer and the furthest device on the circuit. A noticeable drop at the far end indicates undersized wire, long daisy-chains, or too many devices on a single run.
How does South Florida’s climate affect my low voltage system?
Humidity and salt air in South Florida accelerate corrosion in wiring and connectors. Outdoor low-voltage connections in coastal conditions develop increased resistance that causes intermittent failures and instability faster than in drier climates.
Are random device resets usually a sign of bad equipment or wiring?
Intermittent failures almost always point to wiring or corroded connections rather than faulty equipment. Corroded connections increase resistance unevenly, which produces the random, unpredictable behavior that looks like a device malfunction.
What is the best way to prevent corrosion in connectors?
Seal every outdoor connector with waterproof silicone gel or heat-shrink tubing with an adhesive lining. This minimizes moisture intrusion and significantly extends the life of the connection in South Florida’s climate.
Can I fix low voltage issues myself or do I need a professional?
Routine checks like testing voltage and inspecting visible connections are manageable DIY tasks. Complex issues involving underground cable faults, large multi-device systems, or persistent intermittent failures are best handled by a professional with the right diagnostic tools.