Security system installation is a process any homeowner or business owner can complete confidently by following a clear, structured sequence of steps. Modern wireless systems from brands like SimpliSafe, Ring, and ADT Blu have stripped away most of the complexity that once required a professional visit. The security system installation steps covered in this guide walk you through everything from gathering tools to testing your final setup, so you protect your property without paying for labor you can handle yourself. Done right, DIY installation saves homeowners $500 or more compared to professional setup costs.
What tools and materials do you need before starting?
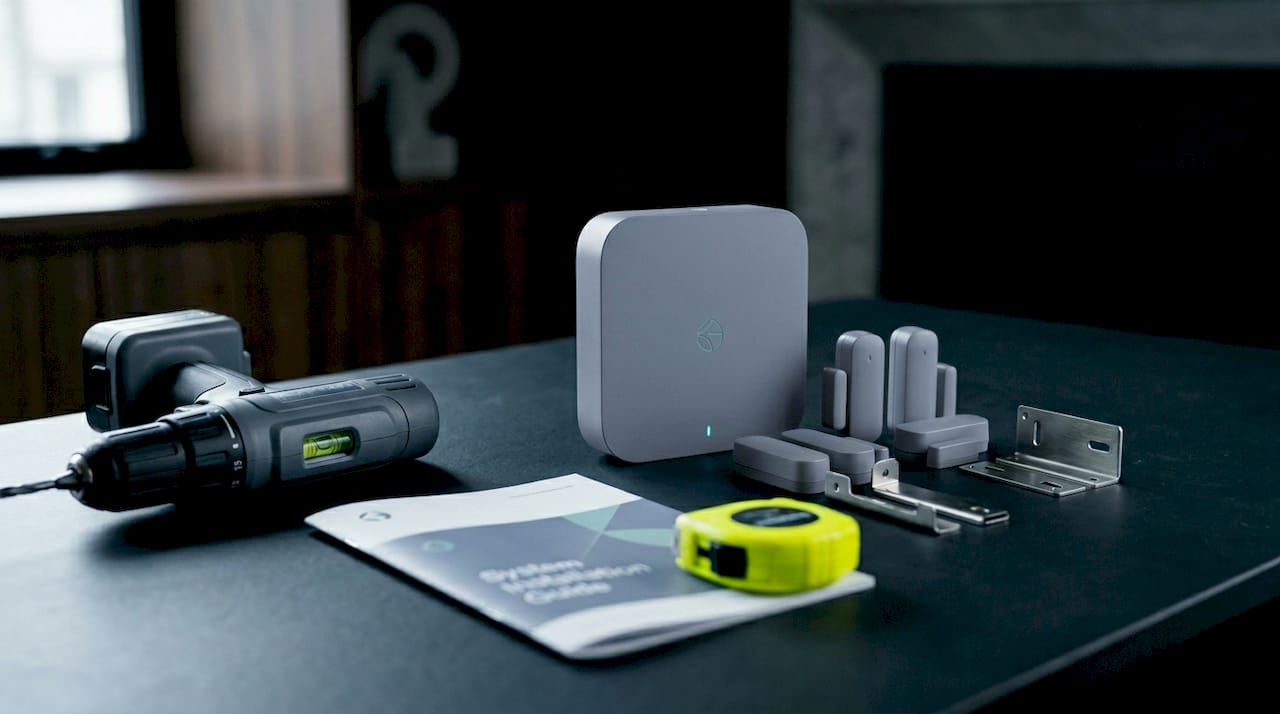
Showing up to an installation without the right tools is the fastest way to waste an afternoon. Gather everything before you touch a single component.
Tools you need:
- Power drill with bits (for mounting cameras and keypads)
- Phillips and flathead screwdrivers
- Ladder (for cameras and high-mounted sensors)
- Level (to keep cameras and panels straight)
- Smartphone or tablet (for app pairing)
- Pencil and painter’s tape (for marking mount points)
- Fish tape or cable clips (if running Ethernet for a PoE wired system)
System components to verify out of the box:
| Component | Purpose | Notes |
|---|---|---|
| Hub or base station | Central command unit for all devices | Place centrally; needs power outlet and Wi-Fi |
| Door and window sensors | Detect entry points being opened | Two-part magnetic design; parts must align closely |
| Motion detectors | Detect movement in rooms or hallways | Avoid pointing at heat sources or pet paths |
| Security cameras | Visual monitoring and recording | PoE cameras need Ethernet; wireless need Wi-Fi signal |
| Keypad or control panel | Arm and disarm the system | Mount near main entry at arm height |
| Siren or alarm | Audible deterrent on trigger | Place where sound carries through the property |
Before mounting anything, read the manufacturer’s quick start guide. SimpliSafe, Ring, and ADT Blu each ship with a printed setup card that maps out the pairing sequence. Skipping it causes the exact pairing failures that frustrate most first-time installers. Verify that all components are compatible with each other, especially if you are mixing devices from different brands or adding third-party cameras to an existing hub.
Pro Tip: Charge outdoor cameras overnight before installation. Outdoor cameras often require a full charge before they can complete the pairing process, and starting with a dead battery wastes time.
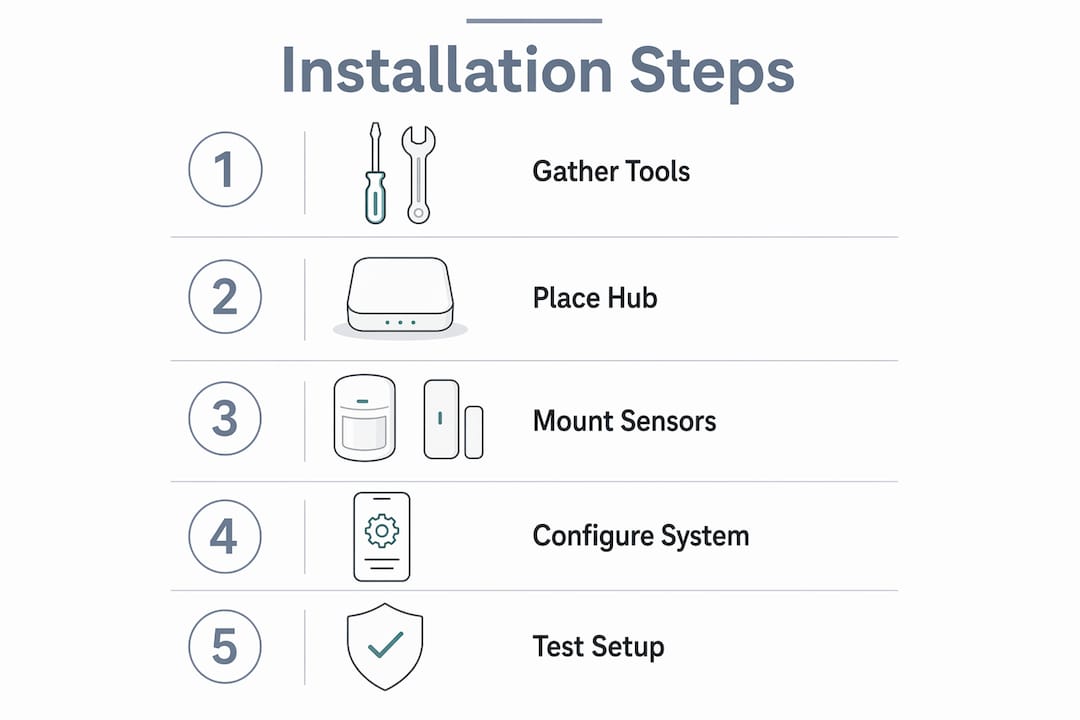
How to install key security system components step by step
The physical installation of your system follows a logical sequence. Work from the hub outward to sensors and cameras.
-
Unbox and inventory everything. Lay all components on a table and match them against the packing list. Missing a sensor now is far better than discovering it after you have patched walls.
-
Place the hub or base station. Set it in a central location with access to a power outlet and a strong Wi-Fi signal. Avoid closets or metal cabinets that block wireless signals. The hub is the core device, and most setup errors happen during app or device pairing rather than physical mounting, so its placement directly affects pairing reliability.
-
Mount door and window sensors. Attach the magnet piece to the door or window frame and the sensor body to the door or window itself. Door sensors require the two parts to sit no more than about 1 inch apart for the circuit to complete. Use the included adhesive strips for interior doors. Switch to screws for exterior doors that take more force.
-
Install motion detectors. Mount them in corners at 6 to 8 feet high, angled to cover the widest path of travel through a room. Keep them away from air vents, windows with direct sunlight, and areas where pets roam. A motion sensor pointed at a heating vent will trigger false alarms every time the furnace kicks on.
-
Mount cameras. For wireless cameras, choose locations that cover entry points, driveways, and blind spots. For a PoE wired system, plan cable routes prior to mounting and protect outdoor runs with conduit or cable clips. Run Ethernet back to the NVR before securing the camera housing permanently.
-
Install the keypad. Mount it near your primary entry point at a comfortable arm height. Most keypads use adhesive or two screws. Keep it within range of the hub.
Pro Tip: Think like a burglar when choosing camera and sensor placement. Walk around your property and identify the three easiest entry points. Those get covered first.
SimpliSafe took about 30 minutes to set up in controlled testing, while ADT Blu averaged about 35 minutes. Your time will vary based on the number of sensors and whether you are running any wired connections.
How do you configure, pair, and test your system?
Physical mounting is only half the job. Configuration is where most people hit a wall, and it is almost always an app or connectivity issue rather than a hardware problem.
Follow this sequence for setup:
- Download the manufacturer’s app (Ring, SimpliSafe, ADT Blu, or your system’s brand) before powering the hub.
- Create your account and follow the in-app setup wizard. Do not skip steps.
- Connect the hub to your Wi-Fi network. Use the 2.4 GHz band for better range if your router broadcasts both 2.4 GHz and 5 GHz.
- Pair each sensor by following the app’s “add device” flow. Most sensors enter pairing mode by pressing a small button or removing the battery tab.
- Check that each paired sensor appears in the app with a green or “online” status before moving to the next one.
- Pull up the live camera feed in the app and adjust the physical camera angle until the frame covers the intended area.
- Set your notification preferences, entry delay, and exit delay before running any tests.
Pro Tip: Activate your system’s test mode before running any live tests. Test mode tells the monitoring center to ignore alerts during your session, so you avoid a false alarm dispatch and a potential fine from your local police department.
Testing after installation is the step most DIY installers skip, and it is the step that catches misinstalled or non-communicating sensors before they matter. Open and close every door and window sensor. Walk in front of every motion detector. Confirm each action triggers a notification in the app.
Troubleshooting common installation and setup issues
Even a careful installation produces a few problems. Here are the most common ones and how to fix them.
Sensor not pairing:
- Replace the battery first. Low batteries cause most pairing failures, even in brand-new sensors.
- Move the sensor closer to the hub during pairing, then relocate it after a successful connection.
- Confirm the hub is in pairing mode before triggering the sensor. The app usually shows a countdown or a blinking indicator.
Wi-Fi connectivity problems:
- Check that your router is broadcasting on 2.4 GHz. Many security hubs do not support 5 GHz.
- If the hub is far from your router, use a Wi-Fi extender or a mesh node. A weak signal causes intermittent disconnections that look like hardware failures. Lowvoltagecorp’s signal boosting guide covers practical fixes for this exact problem.
- Restart the hub after any network change.
False alarms from motion sensors:
- Reposition sensors away from windows, vents, and pet traffic paths.
- Lower the sensitivity setting in the app if your system supports it.
- Add pet-immune motion detectors if you have animals over 40 pounds.
Camera image quality issues:
- Clean the lens with a microfiber cloth. Dust and condensation are the most common culprits.
- For PoE systems, poor Ethernet cabling degrades camera performance more than any other factor. Check connectors and replace any cable with a damaged jacket.
- Adjust the camera angle to reduce glare from direct light sources.
If you have worked through these steps and a device still will not cooperate, contact the manufacturer’s support line before assuming the hardware is defective. Most brands offer video tutorials and live chat that resolve issues in under 20 minutes.
Best practices for finalizing your setup and keeping it reliable
Getting the system installed is one thing. Keeping it working six months later is another.
Run a full walk test after installation. Walk through every zone in your home or business with the system armed in test mode. Confirm every sensor triggers and every camera records. Comprehensive walk tests catch misinstalled sensors and reduce false alarms over the long term.
Post your alarm signs and window decals. Place them at every entry point and at eye level near the front door. Visible deterrents reduce the likelihood of a break-in attempt before your system ever needs to trigger.
Schedule maintenance tasks:
- Replace sensor batteries every 12 months or when the app sends a low-battery alert.
- Check for firmware updates monthly. Manufacturers push security patches that protect against vulnerabilities.
- Inspect camera lenses and housing for weather damage every six months, especially for outdoor units.
Consider your monitoring options. DIY installation does not lock you into self-monitoring. Three categories exist: fully self-monitored, professionally monitored with a DIY install, and hybrid systems. Professional monitoring adds a monthly fee but delivers faster emergency response than a phone notification you might miss at 3 a.m.
| Factor | Wired (PoE) system | Wireless system |
|---|---|---|
| Installation complexity | Higher; requires cable routing | Lower; adhesive mounts and app pairing |
| Reliability | Very high; no signal interference | High; depends on Wi-Fi strength |
| Flexibility | Low; cameras are fixed to cable runs | High; sensors and cameras relocate easily |
| Cost | Higher upfront for cable and NVR | Lower upfront; subscription may apply |
| Best for | Permanent installs, businesses | Renters, homeowners, small businesses |
Pro Tip: Integrate your security system with a smart home platform like Amazon Alexa or Google Home if your brand supports it. Voice-activated arming and disarming adds convenience and reduces the chance of leaving the system off by accident.
For property managers handling network wiring optimization, a well-planned cable infrastructure makes future camera additions far simpler.
Key takeaways
Successful security system installation depends on preparation, correct component placement, and thorough testing before you rely on the system for real protection.
| Point | Details |
|---|---|
| Gather tools before starting | A drill, level, smartphone, and the manufacturer’s guide prevent most installation delays. |
| Place sensors within 1 inch | Door and window sensor parts must align within about 1 inch for reliable circuit completion. |
| Most failures happen in the app | Hub pairing and app setup cause more installation problems than physical mounting errors. |
| Always run a walk test | Testing every sensor and camera after setup catches problems before they become security gaps. |
| Match monitoring to your lifestyle | Professional monitoring adds cost but provides faster response than self-monitoring alone. |
What I have learned from doing this work every day
The most common thing I see when Lowvoltagecorp gets called in after a DIY install is not bad hardware. It is rushed placement. Someone stuck a motion sensor on a wall in 30 seconds without thinking about the angle, and now it misses the front half of the room entirely. Or a door sensor is mounted a full two inches away from its magnet, so it never actually triggers. These are not technical failures. They are patience failures.
The other misconception I run into constantly is that wired systems are too complicated for a property owner to plan. That is not true. What wired systems require is planning before you drill a single hole. If you map your cable routes on paper first, the physical work is straightforward. Where people get into trouble is drilling first and figuring out the path later.
My honest advice: budget twice as much time as you think you need for the pairing and testing phase. The physical mounting usually goes faster than expected. The app setup, the Wi-Fi troubleshooting, the sensor sensitivity adjustments. that is where the clock runs. If you hit a wall after an hour of troubleshooting a single device, call the manufacturer. Their support teams are genuinely good, and they have seen your exact problem a thousand times.
DIY installation gives you real knowledge of your own system. You know where every sensor is, why it is there, and how to adjust it. That knowledge is worth more than the $500 you save on labor.
— Aaron
Ready to take your security setup further?

If you have worked through your installation and want to make sure the system performs at its best, Lowvoltagecorp specializes in exactly the kind of work that takes a good DIY setup and makes it bulletproof. From camera installation and PoE wiring to cell booster integration and network optimization, the team handles the technical layers that go beyond what a quick-start guide covers. Property owners in South Florida can explore cost-saving security upgrades that pair professional-grade results with smart budgeting. Whether you need a second set of eyes on your setup or a full installation from scratch, Lowvoltagecorp is the call that gets it done right.
FAQ
What are the basic security system installation steps?
The core steps are: gather tools and components, place the hub in a central location, mount door and window sensors, install motion detectors and cameras, pair all devices through the manufacturer’s app, and run a full walk test. Most DIY wireless systems follow this sequence regardless of brand.
How long does DIY security system installation take?
Setup time depends on the number of components and whether you are running wired connections. SimpliSafe took about 30 minutes and ADT Blu about 35 minutes in testing, though outdoor cameras that need overnight charging can extend the process to a full day.
Why won’t my sensor pair with the hub?
Low batteries, out-of-range placement, and incorrect pairing mode cause the majority of pairing failures. Replace the battery, move the sensor within a few feet of the hub, and confirm the hub is actively in pairing mode before triggering the sensor again.
Is DIY installation reliable compared to professional installation?
DIY installation produces reliable results when sensors are placed correctly and the system is fully tested after setup. The gap between DIY and professional results comes down to placement precision and testing thoroughness, not the hardware itself.
Do I need professional monitoring after a DIY install?
No. You can self-monitor through the app, use a professional monitoring service, or use a hybrid of both. Professional monitoring adds a monthly fee and delivers faster emergency dispatch, which matters most for properties that are frequently unoccupied.